
I remember the Tuesday morning I hit my breaking point. Sarah was three, Maya was a toddler, and Leo was just starting to crawl. I looked at our living room and realized I couldn’t see the floor. It wasn’t just a mess; it was a mountain of plastic, flashing lights, and “educational” blocks that no one was actually playing with. My kids weren’t engaged; they were overstimulated and frankly, kind of cranky.
That was the day I hauled three trash bags of toys to the basement and set up our first rotation. I had exactly one small bookshelf and a corner of the hallway to work with. If you’re living in a home where you’re tripping over a xylophone every time you try to make coffee, you don’t need a bigger house. You need a system.
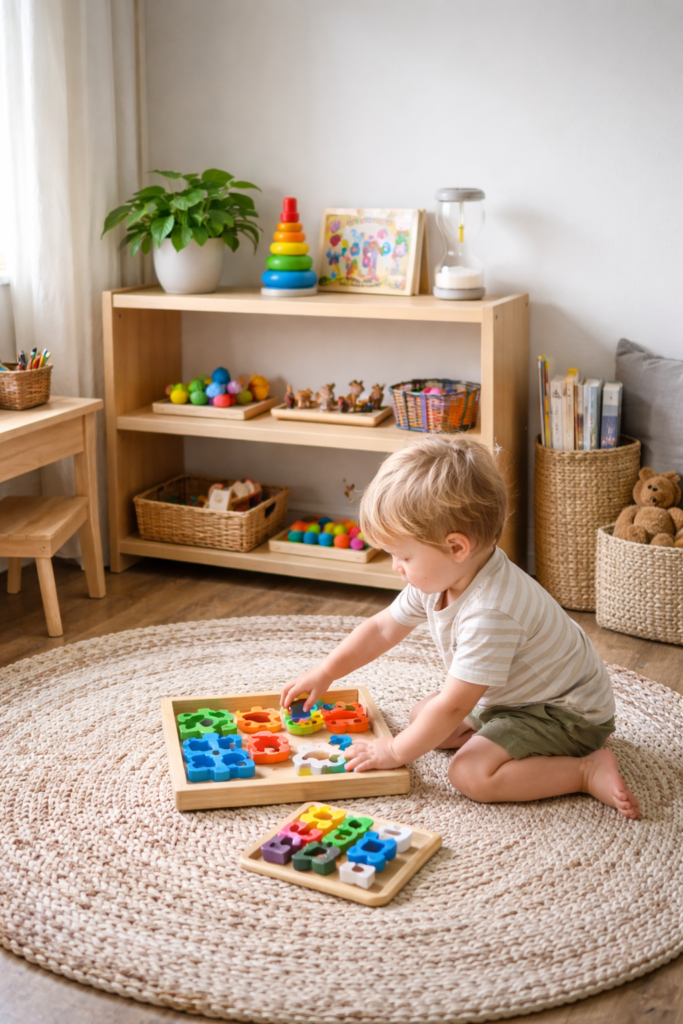
1. Minimalist Montessori Shelving for Tiny Living Rooms
When I first started, I thought I needed those expensive, birch-wood tiered shelves you see on Instagram. I was wrong. In a small space, the best shelf is the one you already have—or better yet, a low-profile unit that doubles as something else. I’ve found that high-end “Montessori” furniture is often a total waste of money when a simple, sturdy cube unit laid on its side does the exact same job for a fraction of the cost.
The secret to a small-space rotation isn’t the shelf itself; it’s the “breathing room” you leave between objects. In my experience, if you cram five trays onto one shelf, the child sees nothing but clutter. I prefer the “Rule of Two.” Two items per shelf level, maximum. This creates a visual invitation rather than a visual assault.
When space is at a premium, you have to think vertically, but only for your own storage. The child’s active shelf must remain low. I used the top of our low shelf for my own books or a single lamp, keeping the bottom two rows strictly for the kids. It’s about defining boundaries—this is their workspace, and everything else belongs to the grown-ups.
I once tried to use a deep closet shelf for Sarah, thinking I was being clever by saving floor space. It was a disaster. She couldn’t see what was in the back, so she just pulled everything onto the floor to find what she wanted. Stick to shallow shelves. If it’s deeper than 12 inches, you’re just inviting a “dump and run” situation that will leave you exhausted by 7:00 PM.
2. Using Vertical Wall Space for Language Activities
If you can’t go out, go up. I’ve discovered that wall-mounted spice racks are the unsung heroes of a small Montessori home. I used these to display books cover-forward. Most traditional bookshelves hide the beautiful covers and only show the spines, which means nothing to a pre-verbal toddler. By using slim wall racks, you save precious square footage while still providing a curated selection.
I’m quite opinionated about book rotations: keep it to five books. Yes, only five. I know you have fifty in a bin somewhere, but trust me, your child will find more comfort in the repetition of those five than the chaos of fifty. Maya used to want the same book about a little red hen three times a night for a month. That’s not boring; that’s mastery.
In addition to books, I used the wall for “matching cards” or nomenclature cards. I would stick a small piece of Velcro to the wall at their eye level. This turned a transition hallway into a learning station. It didn’t take up any floor space, and it kept Leo busy while I was trying to get everyone’s shoes on.
Avoid those massive, colorful alphabet posters. They are visually noisy and rarely help with actual literacy at a young age. Instead, I’ve found that clear, realistic photos of family members or local animals at the child’s eye level are far more engaging. It grounds them in their reality without making your home look like a primary school classroom.
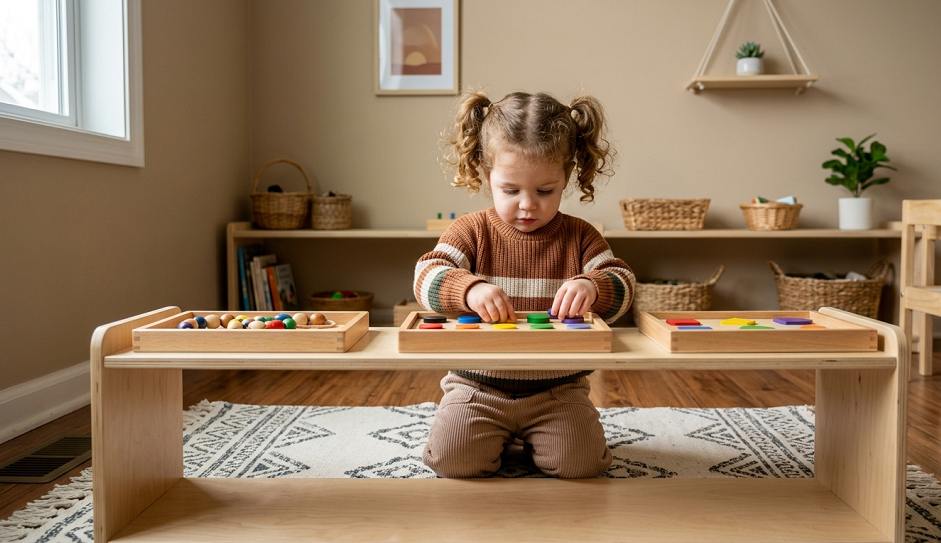
3. Modular Tray Systems for Rapid Toy Swapping
In a small apartment or a tiny house, you don’t have the luxury of “staging” a shelf for an hour. You need a “grab and go” system. I started using small wooden trays—and honestly, even sturdy baking sheets work in a pinch—to keep activities contained. Each tray represents one complete task.
When I was raising my three, I kept a “rotation bin” in the top of my closet. Every Sunday night, I would swap out three trays. If Sarah was bored with the “pouring beans” activity, I’d whisk the tray away and replace it with “bead stringing.” Because the items were already on the tray, the swap took thirty seconds.
I’ve seen parents try to rotate individual pieces of a set, but that is a recipe for losing your mind. If the blocks go away, the whole set goes away. I learned the hard way that leaving “just a few” pieces of an old activity out leads to them getting mixed with the new ones. Suddenly, you have Lego bricks in your sensory rice, and nobody is happy.
One thing I absolutely insist on: the tray must be light enough for the child to carry. If it’s too heavy, they won’t independent-access it, which defeats the whole purpose of Montessori. I found that cheap bamboo trays from the thrift store were the perfect weight for Maya and Leo. If they can’t move it, they can’t master it.
4. Multi-Purpose Furniture as a Rotation Hub
In a small space, every piece of furniture has to earn its keep. I used a sturdy wooden coffee table as a “work station” during the day and a place for my tea at night. Underneath that table, I tucked a small basket that held our current “heavy work” activity, like a set of weighted silks or a small indoor climbing arch.
I’ve found that “specialty” Montessori tables are often unnecessary. I would much rather see a parent buy a set of adjustable-height legs for a standard small table. As Sarah grew, we just twisted the legs to make it taller. It saved us from having to buy, store, or sell multiple pieces of furniture over the years.
There’s a trend right now for “learning towers” in the kitchen. While I love the concept, they are massive space-hogs. In our tiny kitchen, I simply used a very stable, wide-based step stool. It did the same thing but could be tucked under the sink when I was actually trying to cook dinner without tripping over a toddler.
Don’t be afraid to use your “grown-up” furniture for rotation. A bottom drawer in the kitchen can be the “snack preparation” station. A bottom shelf in the linen closet can be the “folding washcloths” station. When you stop seeing “Montessori” as a specific set of toys and start seeing it as a way of living, your small space suddenly feels much larger.
5. Closet Conversion for “Hidden” Learning Nooks
If you have a reach-in closet, you have a Montessori classroom. I took the doors off our hallway closet and turned the bottom two feet into a dedicated work space for Leo. By removing the doors, we gained the “swing space” back, and the closet became an inviting alcove rather than a dark storage hole.
I used tension rods at the bottom of the closet to hang small baskets. These held his “loose parts”—things like acorns, large smooth stones, or wooden rings. Because they were tucked into the closet, they didn’t clutter the main walkway, but they were perfectly accessible to him.
I’ve heard people say that you shouldn’t put “work” in a closet because it feels like a timeout. I strongly disagree. For a child like Maya, who was easily overwhelmed by noise, that little closet nook was her sanctuary. It provided natural “blinkers” that helped her focus on her puzzles without being distracted by whatever her siblings were doing.
A quick side note: if you do this, make sure the lighting is good. I stuck a simple battery-powered “puck light” on the ceiling of the closet. It made the space feel intentional and bright. A dark workspace is a neglected workspace, and in a small home, you can’t afford to have any “dead” zones.
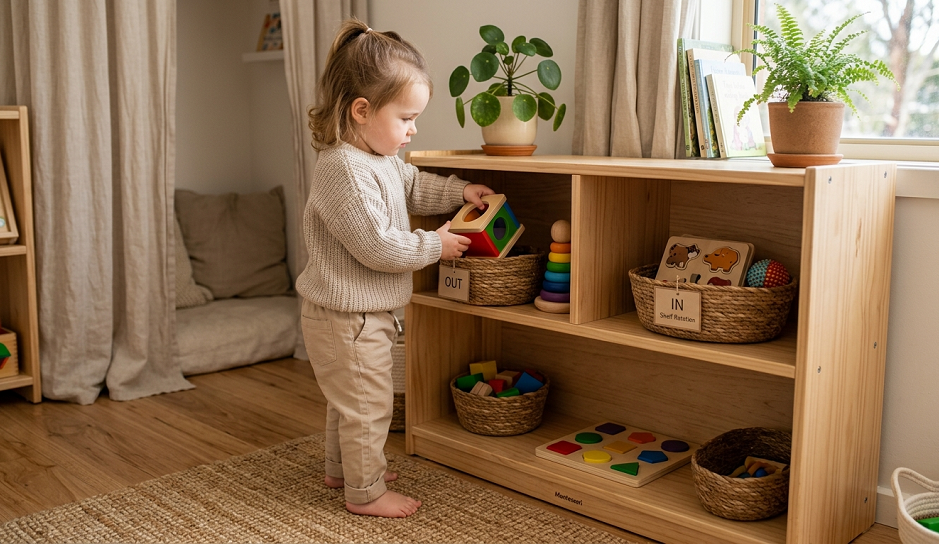
6. The “One-In, One-Out” Basket Method
In a truly tiny space, you might not even have room for a shelf. When we stayed in a small cabin for a summer, I used the basket method. We had three beautiful, low baskets on the floor. Each held one type of activity. One for building, one for fine motor, and one for “imagination.”
The rule was simple: if a new activity came out of the storage bin, one of the three baskets had to go back. This taught my kids about limits and choices far better than any lecture ever could. Sarah would spend ten minutes debating whether she was “done” with the silk scarves before she could bring out the wooden animals.
I’ve discovered that large, deep toy chests are the enemy of peace. They are where toys go to die. Children just dig to the bottom, throwing everything else behind them. Baskets are superior because they force a limit on volume. If it doesn’t fit in the basket, you have too much stuff.
I prefer natural fibers like seagrass or wicker. They add a sense of calm and beauty to a room that plastic bins just can’t match. When your living room is also your child’s playroom, aesthetics matter. You deserve to live in a home that feels like a home, not a daycare center.
7. Rotating Art Supplies in a Small Kitchen
Art can be the messiest part of Montessori, especially in a small space. I never kept all the art supplies out at once. Instead, I rotated the medium. One week it would be watercolor painting; the next, it would be playdough with natural stamps like cinnamon sticks and star anise.
I used a rolling cart for a while, but it felt too cluttered in our narrow kitchen. I switched to a “Station in a Box” system. I had a “Painting Box,” a “Cutting Box,” and a “Gluing Box.” When Sarah wanted to do art, she’d ask for one box. It contained everything—the paper, the tool, and the “cleanup” cloth.
I’ve found that giving a child a giant box of 64 crayons is a mistake. They spend more time dumping them out than drawing. I gave my kids three colors at a time. I’d choose colors that complemented each other—maybe three shades of blue and green. It made their artwork look intentional and reduced the “scribble-scrabble” chaos.
Keep the art rotation high up or behind a child-proof latch if you aren’t ready for a surprise mural on your hallway wall. Montessori is about freedom within limits, and “freedom to paint the sofa” was never a limit I was willing to test. By controlling the access to the boxes, I ensured that art remained a focused, respected activity.
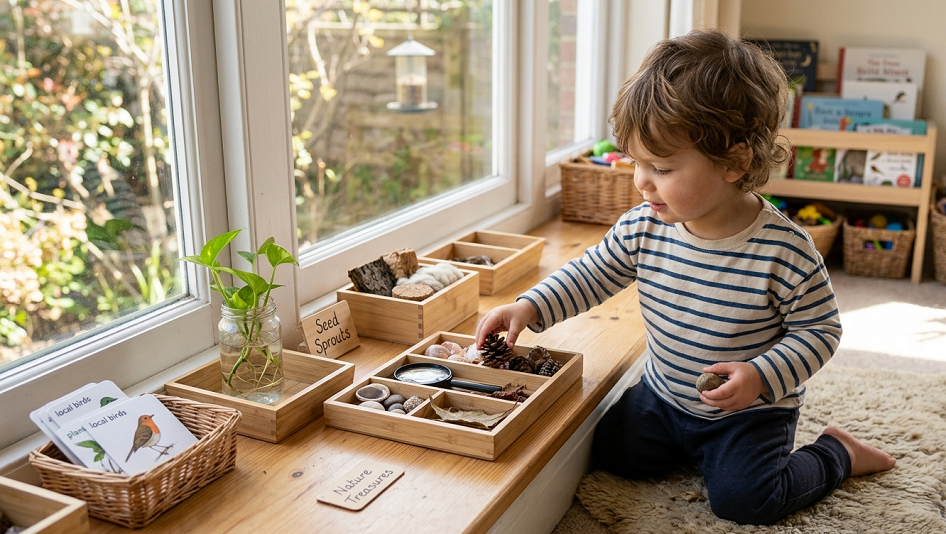
8. Window Sill Science and Nature Displays
Don’t overlook your window sills. They are the perfect “shelving” for nature-based Montessori rotations. We had a “Nature Table” that was actually just a 2-foot stretch of window sill in our dining area. On it, we placed things we found on walks—a bird’s nest (abandoned, of course), interesting rocks, or a jar of sprouting beans.
I found that rotating these natural items kept the kids connected to the seasons even though we didn’t have a big backyard. In the autumn, the sill was covered in different types of leaves for sorting. In the spring, we had a small magnifying glass and a tray of seeds.
I’ve seen people buy expensive “science kits,” but I think that’s a waste of time for young children. Nature provides the best curriculum. A bowl of snow brought inside to melt or a few stalks of celery in dyed water will teach them more about the world than a plastic “lab” set ever will.
One quick tip: use a small tray or a piece of felt to define the “nature zone” on the sill. It prevents things from rolling off and reminds the child that these items are for observation and study, not for throwing. It’s a small boundary that makes a big difference in how they interact with the objects.
9. Creating a “Practical Life” Rotation in the Bathroom
Practical life is the heart of Montessori, and the bathroom is often the most cramped room in a small house. I managed this by rotating the “Self-Care Station.” On a small suction-cup shelf in the shower, I would rotate different “washing” tools—a natural sponge one month, a soft washcloth the next.
At the sink, I kept a small tray with their toothbrush and a tiny pitcher for rinsing. I’ve discovered that if you leave everything out—the toothpaste, the hairbrush, the nail file—it all ends up in the toilet. By rotating what was “active,” I kept the focus on the skill they were currently learning.
When Leo was learning to brush his hair, only the brush was on the tray. When he moved on to trying to wash his own face, the brush went into a drawer and a small bowl and cloth appeared. This “singular focus” is what allows a child to achieve true independence without becoming overwhelmed.
I strongly suggest getting a “faucet extender” rather than a whole new kid-sized sink. It’s a five-dollar fix that saves space and empowers the child. Montessori doesn’t have to be expensive or “aesthetic” to be effective; it just has to be accessible.
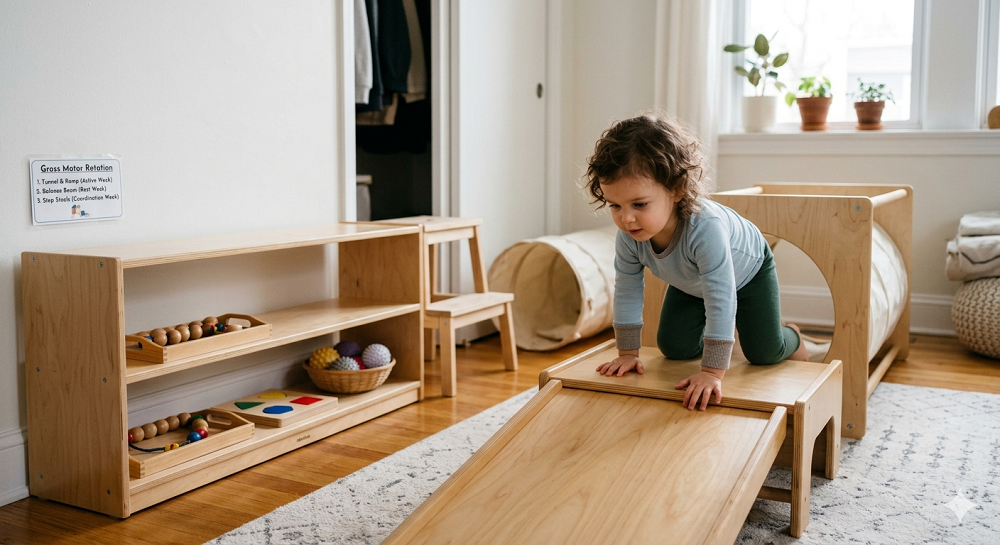
10. Rotation Strategies for Gross Motor Play Indoors
When you have three kids in a small space during a rainy week, you need a plan for movement. I couldn’t keep a pikler triangle or a balance beam out all the time. Instead, I rotated “Movement Bins.” One bin might have a set of “stepping stones” (which were just non-slip carpet squares), and another might have a soft tunnel.
I’ve found that “active” rotations are just as important as “sit-down” work. If the kids are getting “the zoomies,” it’s usually because their environment is too static. I would pull out the “movement” tray, clear the rug, and let them go at it for thirty minutes before rotating it back into the closet.
Don’t buy those massive plastic slides for your living room. They are an eyesore and they take up way too much space. Instead, I used a sturdy wooden plank that I could prop up on the sofa to make a slide, then slide it under the sofa when we were done. That’s the kind of “hidden” rotation that keeps a small house functional.
A side note on “open-ended” movement: a simple set of play silks can be rotated in and out. They take up zero space when folded but can become capes, forts, or “water” for a wooden boat. In a small space, toys that have a high “volume-to-play” ratio are the only ones allowed to stay.

11. The “Sound and Music” Basket Rotation
Music is wonderful until it’s a drum set in a 900-square-foot apartment. I learned very quickly to rotate our musical instruments. We had one “Music Basket” that lived on the bottom of a side table. It only ever held two instruments at a time.
One week it might be a triangle and a pair of rhythm sticks. The next, it might be a small hand drum and a bell. I’ve discovered that when kids have access to a whole “band” at once, they just make noise. When they have two instruments, they make music. They explore the different sounds and rhythms with much more intention.
I am very opinionated about “battery-operated” music toys. Get rid of them. They are a total waste of your child’s auditory development. A real wooden recorder or a high-quality glockenspiel provides a much better sensory experience and won’t drive you to the brink of a migraine with repetitive, tinny songs.
If you’re worried about the noise level in a small space, rotate in “quiet” music activities. A set of “sound jars” (pairs of opaque containers filled with different materials like sand, rice, or bells that the child has to match by ear) is a brilliant Montessori activity that is completely silent. It’s a win for their brain and your ears.
12. Digital and Audio Rotation for Small Spaces
We didn’t have room for a massive media center, so I used a “Yoto” player or a simple CD player for our audio rotation. I would put out three “cards” or CDs for the week. This allowed the kids to have autonomy over their environment—they could choose the music or the story—without me having to manage a screen.
I’ve found that audio stories are incredible for developing focus in a way that television just isn’t. When Maya was four, she would sit for thirty minutes listening to a story, her hands busy with some playdough. This “dual engagement” is much easier to facilitate in a small space because it doesn’t require any extra equipment.
Avoid the “endless scroll” of Spotify or YouTube for kids. It’s too much choice. By rotating physical cards or labeled CDs, you are giving them a “shelf” for their ears. It’s a boundary that helps them appreciate what they are listening to.
I once tried to let them have access to a tablet with “educational” games. I’ve discovered the hard way that it’s a slippery slope. Within a week, they weren’t interested in their wooden blocks or their puzzles; they just wanted the screen. I went back to our “audio-only” rotation and the peace returned to our home almost instantly.
13. Rotating “Real-World” Tools in the Entryway
The entryway is often the smallest part of the house, but it’s the most important for Montessori “order.” I rotated the tools available in our “Welcome Station.” In the winter, there was a small boot brush and a tray for wet mittens. In the summer, there was a basket with sun hats and a small bottle of sunscreen they could try to apply themselves.
By rotating the function of the entryway, I kept the clutter down. We didn’t need a year-round “everything” station. We only needed what was relevant to now. I’ve found that children thrive when their environment reflects the current reality of their lives.
I used a single low hook for each child. If they had three coats, two were in the “long-term” closet and only one was on their hook. This removed the “which one should I wear?” struggle that can derail a morning in ten seconds flat.
One last thing: keep a small “cleaning” rotation here too. A tiny dustpan and brush hung on a low hook allows the child to take responsibility for the dirt they track in. It’s a simple “Practical Life” task that feels like a contribution to the family, not a chore. When everyone has a role, even a small house feels like a team headquarters.
The “Real Talk” on Montessori Rotations
Look, I’m going to be honest with you: sometimes you will spend an hour perfectly curating a shelf, and your child will ignore it for three days. Or worse, they will take every single tray and dump them into one giant pile in the middle of the rug. That isn’t a failure. That’s a child being a child.
I’ve found that the biggest mistake parents make—and I made this too—is rotating too often. If you change the shelves every Sunday just because “that’s what the blog said,” you might be interrupting a child’s deep cycle of learning. I started waiting until I saw “signs of misuse.” If Leo started throwing the puzzle pieces instead of fitting them together, that was my signal that the challenge was over and it was time for something new.
Also, don’t feel like you need “themes.” You don’t need a “Space Theme” in January and a “Flower Theme” in May. That’s for the adults, not the kids. I discovered that a “mixed” shelf—one puzzle, one practical life task, one art activity, and one building set—is much more effective for daily play than a hyper-focused theme that might not interest the child at all.
Lastly, give yourself grace. My house didn’t look like a magazine. There were crumbs under the sofa and sometimes the “rotation” was just me putting a blanket over a pile of toys so I didn’t have to look at them anymore. The goal is connection, not perfection. If the shelf rotation is making you stressed and resentful, stop doing it for a week. The toys will still be there when you’re ready.
Parting Wisdom
Setting up a Montessori environment in a small space is really just an exercise in editing. You are the editor of your child’s world. By choosing what stays and what goes, you are creating a space where they can finally hear themselves think. It’s not about having the “right” toys; it’s about having the right amount of space between the toys.
I’ve raised my three, and they are all out in the world now, doing their own thing. Looking back, they don’t remember the specific wooden trays or the brand of the shelves. They remember that our home felt like a place where they could “do it themselves.” They remember that I trusted them with real glass pitchers and sharp-ish garden tools.
If you’re feeling overwhelmed, just start with one shelf. Clear it off, put two things on it, and see what happens. You might be surprised at how much more your child plays when they have less to choose from.
What is the biggest struggle you’re facing with your small space right now? Is it the toy storage, or just the feeling that the “stuff” is taking over your life? Drop a comment below—I’d love to help you brainstorm a solution that actually works for your home!