

The pasta water was boiling over, Leo was crying because his blue truck was “tired,” and I was tripping over a mountain of stray shoes in the hallway. I felt like a drill sergeant whose recruits had completely mutinied. “Leo, pick up the truck! Sarah, please just set the table!” I was met with blank stares and heavy sighs. In that moment, I realized my kids weren’t being defiant; they were just overwhelmed by a world designed for giants.
I spent years trying to “make” my kids help, which usually just meant me doing it myself while grumbling under my breath. It wasn’t until I stopped barking orders and started building “stations” that things changed. Montessori isn’t just for fancy preschools with wooden blocks; it’s a sanity-saver for the average home. It’s about giving a child a designated, manageable space where they can actually succeed.
When Sarah and Maya were little, I thought “chores” were things I assigned. I was wrong. Chores should be invitations to participate in the family rhythm. If you’re tired of the power struggles, you have to stop being the boss and start being the architect of their environment.
Here are the 10 Montessori-style stations that saved my house—and my relationship with my three kids—from the brink of constant “no.”
1. The Low-Reach Beverage and Hydration Station
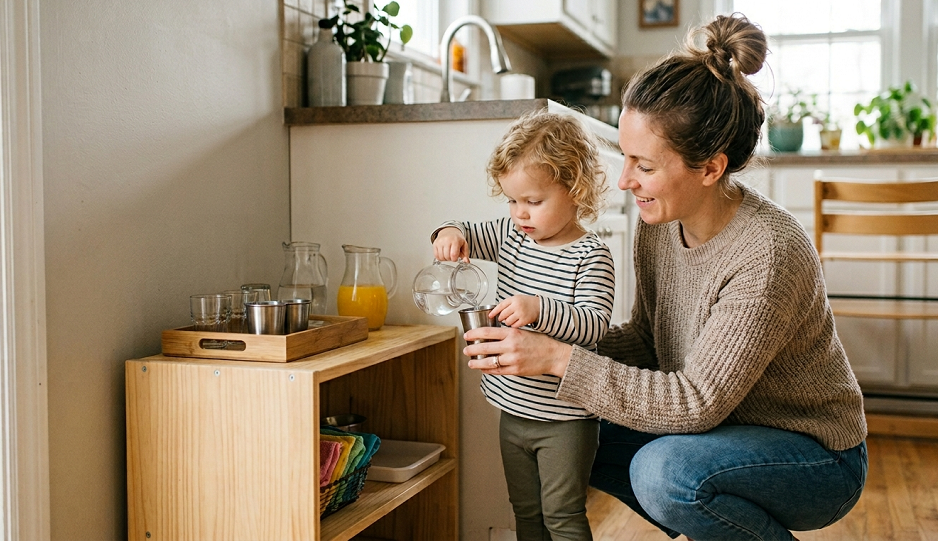
I used to spend half my morning pouring cups of water that would inevitably get knocked over five minutes later. It was a cycle of “Mom, I’m thirsty” followed by “Mom, I spilled!” I finally realized that if I wanted them to be responsible for their hydration, I had to get out of the way. I cleared out a bottom cabinet in the kitchen and turned it into the Beverage Station.
I’ve found that those fancy, heavy glass dispensers are a total waste of time, even if they look beautiful on Pinterest. They are too heavy for small hands and the spigots always leak. Instead, I discovered the hard way that a small, plastic 1-liter pitcher with a lid truly works if you’re patient enough to teach the “two-handed pour.”
Inside this station, I kept four small, stable glasses (the Ikea ones are perfect) and a stack of clean rags. Why the rags? Because spills are part of the learning process. If you freak out when they spill, the station becomes a source of stress rather than independence. I told Leo, “If some water misses the cup, that’s okay. Here is your cloth to dry it up.”
By the time Maya was four, she wasn’t asking for water anymore. She was proud of her ability to serve herself. This station removes the “middleman” (you) and gives the child a sense of physical agency. It’s not just about the water; it’s about the message that they are capable of meeting their own basic needs.
2. The Mudroom “One-Hook” Entryway System
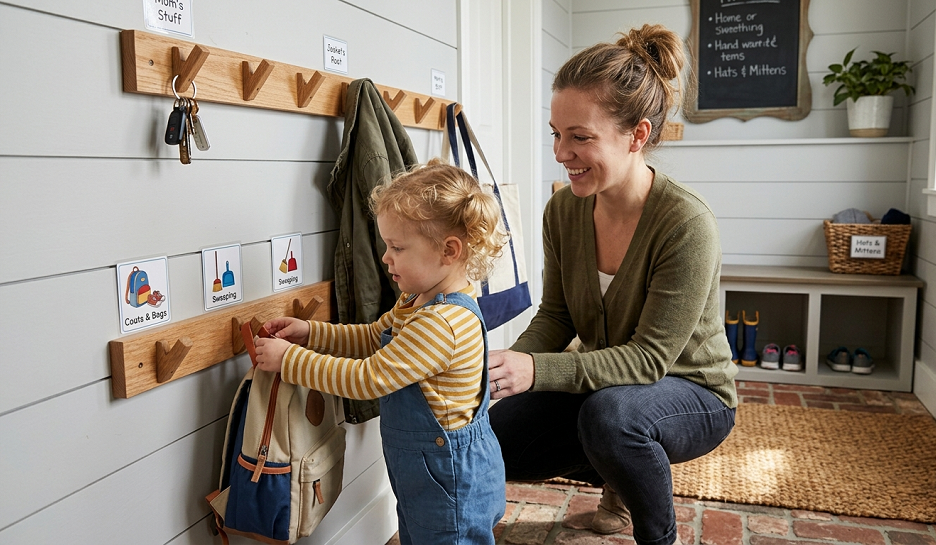
The “shoe pile” at the front door is the universal symbol of parenting frustration. I used to yell about shoes every single day until I sat down on the floor and looked at our coat rack from Maya’s eye level. It was miles away. She couldn’t reach the hangers, so of course her coat ended up on the floor.
I abandoned the idea of a “family” coat closet and installed individual hooks at exactly 3 feet high. Each child had one hook for their coat and one basket for their shoes. I’m quite opinionated about the “one-hook” rule. Don’t give them three hooks; they will just bury the bottom ones. One hook forces a choice and a specific habit.
Leo struggled with the “basket” concept until I put a picture of his sneakers on the front of it. We call this “visual cueing.” It takes the mental load off the child. They don’t have to think “Where do these go?” The basket literally tells them. It’s a simple system that eliminates the “where are my shoes?” panic at 7:00 AM on a school day.
I also kept a small child-sized broom and dustpan right next to this station. If they tracked in dirt, I didn’t sweep it up. I handed them the broom. It wasn’t a punishment; it was just the natural consequence of walking inside with muddy boots. When they own the cleanup, they become much more careful about the mess they make in the first place.
3. The Self-Serve Snack Pantry Drawer
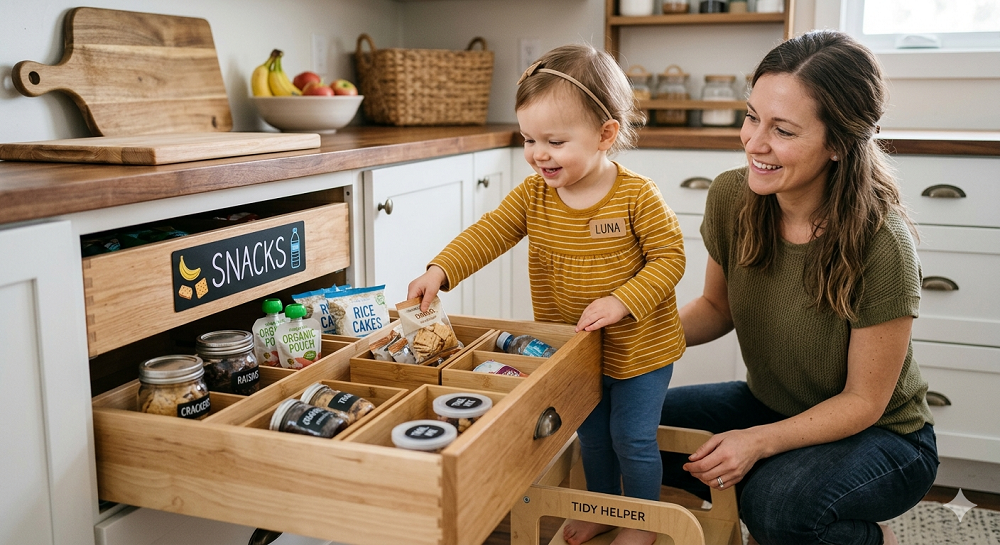
Stop hiding the snacks in the high cabinets. I know, you’re afraid they’ll eat the whole box of crackers in one sitting. I had that fear too. But keeping food “gatekept” creates a power dynamic where the child is constantly begging and the parent is constantly saying “no” or “not yet.”
I designated one bottom drawer in the pantry as the “Yes Drawer.” Every morning, I would put a pre-approved amount of healthy snacks in there—sliced apples in a container, a small bag of pretzels, a cheese stick. The rule was: “You can have anything in this drawer whenever you feel hungry, but once it’s gone, the kitchen is closed until dinner.”
This taught Sarah and Maya about “pacing.” In the beginning, Sarah would eat everything by 10:00 AM. I had to be firm and say, “I see you ate your snacks early. We will have dinner at 6:00 PM.” It was a hard afternoon for her, but she learned. By the next day, she was saving her favorite cheese stick for the afternoon slump.
I’ve seen parents try to use those complex “snack charts” with stickers. Honestly, they are a distraction. A simple, physical drawer is much more effective because it mimics real life. You have a resource, you manage it, and when it’s gone, you wait. It builds impulse control in a way that an adult-managed snack time never could.
4. The “Table Captain” Setting Station
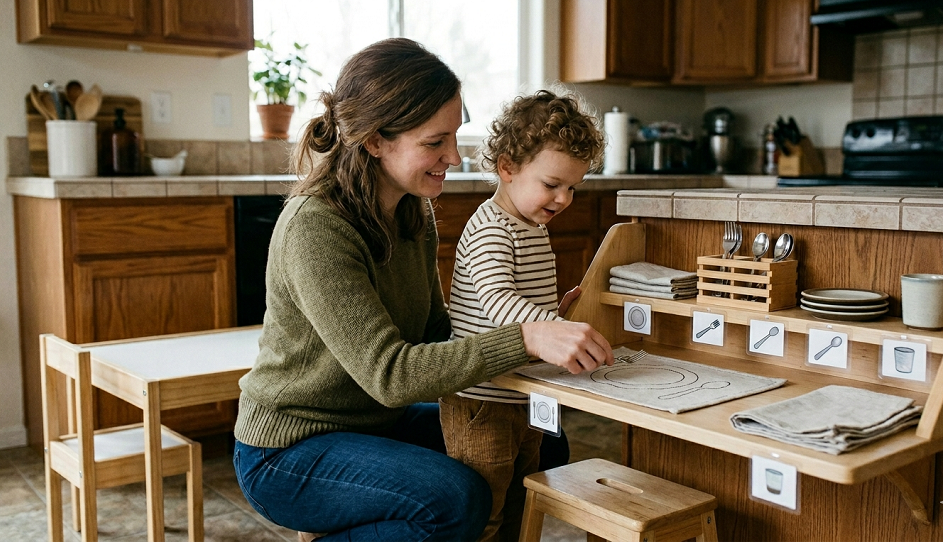
Dinner time used to be my most stressed hour. I was trying to finish the meal while the kids were running circles around the kitchen. I realized I needed them involved in the “transition” to the meal. We created the Table Captain Station in a low kitchen cupboard.
This station held placemats, napkins, and the “daily” silverware. I don’t believe in using plastic utensils for “training.” I found that giving my kids real, small stainless steel forks and ceramic plates actually made them more careful. When something is “unbreakable,” kids treat it with reckless abandon. When it’s “real,” they feel the weight of the responsibility.
The station included a “template” placemat. I took a plain cloth placemat and used a fabric marker to trace the outline of a plate, a fork, and a spoon. This turned setting the table into a matching game. Leo didn’t need me to tell him where the spoon went; the placemat told him.
This took the “chore” aspect out of it and turned it into a contribution. I’d say, “The family is ready to eat, Table Captain! We need your help to prepare the space.” It gave him a role and a sense of belonging. Instead of a power struggle over stopping his play, he was transitioning into a meaningful job that the whole family relied on.
5. The “Spray and Wipe” Cleaning Caddy
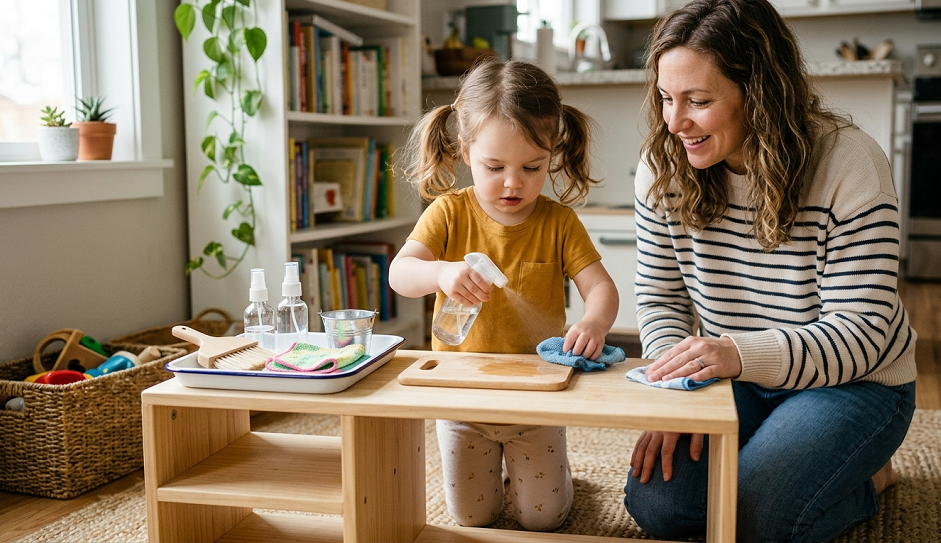
Most kids actually love to clean; they just hate being told to clean. The novelty of a spray bottle is a powerful motivator. I put together a small cleaning caddy for each child. It contained a small spray bottle with 90% water and 10% white vinegar (no harsh chemicals!), a microfiber cloth, and a scrub brush.
I’ve found that giving kids “toy” cleaning sets is a waste of time. They know they don’t actually work. Give them a real cloth that actually picks up dust. When I noticed fingerprints on the sliding glass door, I didn’t make it a “job.” I’d say, “I noticed the windows look a little foggy. Does anyone want to use the spray bottle?”
The key here is to lower your expectations of the “result.” Sarah would often leave streaks or miss a spot. I had to bite my tongue and not “fix” it while she was watching. If you go behind them and redo the work immediately, you kill their confidence. Wait until they go to bed if you really can’t stand the streaks.
This station lived under the sink with a child-proof latch that they could operate (once they were old enough). Having the tools accessible meant that “cleaning up” became a spontaneous activity. Maya would often see a spill and grab her caddy before I even noticed the mess. That’s the goal: internalizing the care of the home.
6. The Laundry Sorting Bins (The “Three-Section” Rule)
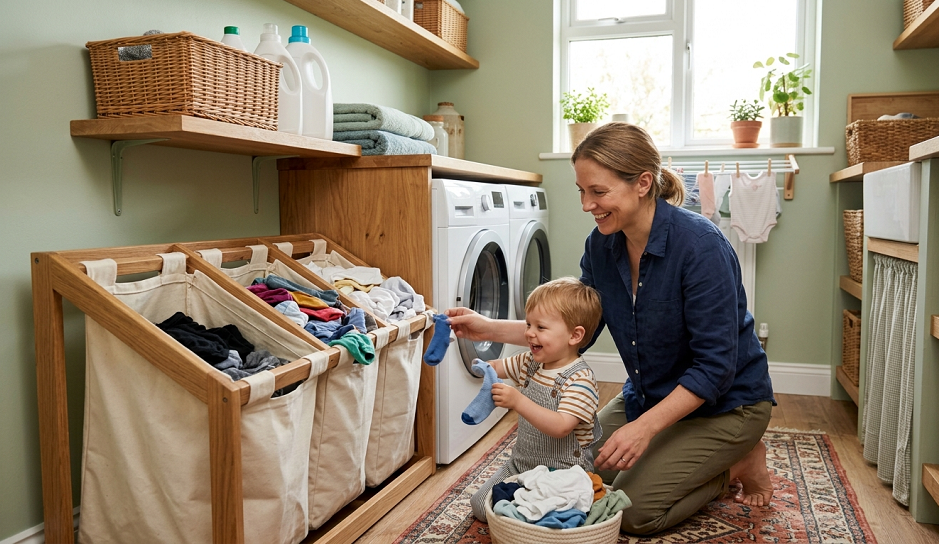
Laundry is the never-ending mountain. For years, I did it all. Then I realized I was raising humans who wouldn’t know how to separate a sock from a sweater. We set up a three-bin sorting station in the hallway: Whites, Colors, and Towels.
I don’t recommend those tall, mesh hampers. They tip over and kids can’t see over the rim. Use low, sturdy plastic bins. I labeled them with both words and color-coded stickers. Even Leo, before he could read, knew that his white undershirts went into the bin with the white circle.
I am very opinionated about the “matching socks” game. I think sitting and matching 50 pairs of socks is a soul-crushing task for a parent. I turned it into a station. All clean, unmatched socks went into a “Mystery Basket.” On Saturday mornings, the kids would sit on the rug and match them. We made it a race.
The most important part of the laundry station is the “folding surface.” We cleared off a low coffee table. I taught them the “Montessori fold”—simple rectangles. It’s not about perfection; it’s about the habit of finishing the cycle. A chore isn’t done until the clothes are in the bin. By making the bins accessible, the “struggle” of getting them to put away clothes vanished because they were part of the process from the start.
7. The Bathroom “Reach and Wash” Step-Up
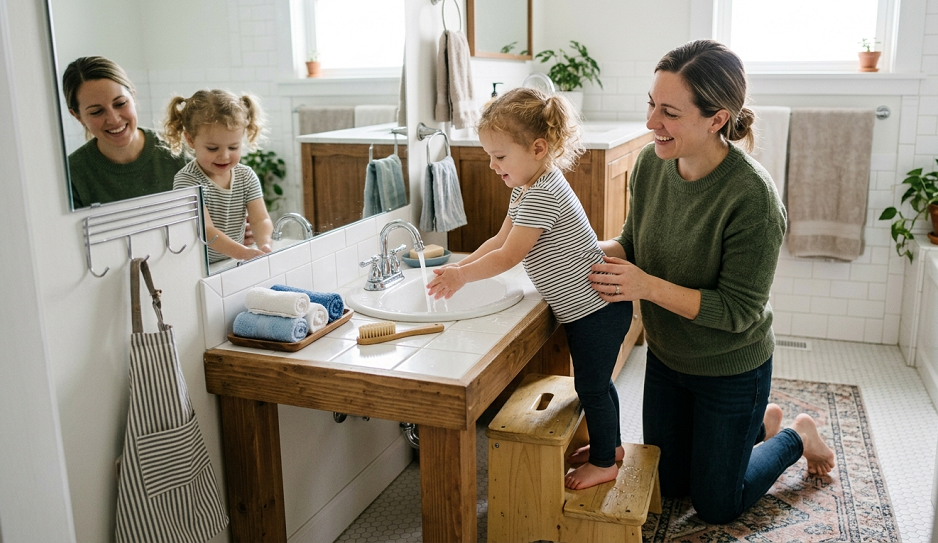
The bathroom is often the hardest place for a child to feel independent. Everything is too high. I see parents hovering over their kids, holding them up to the sink to wash their hands. This is a recipe for a backache for you and a “baby” complex for them.
We invested in a heavy-duty, two-step stool that stayed at the sink. But the real “station” was the setup on the counter. I put soap in a foaming dispenser (easier for small hands to pump) and moved the hand towel to a low hook next to the sink instead of the high bar.
I also set up a “tooth brushing tray.” It held their brush, a small tube of paste, and a timer. I’ve found that the 2-minute sand timers are much more effective than digital ones. There is something hypnotic about watching the sand fall that keeps a toddler engaged.
If your child is struggling with “potty hygiene,” put a basket of wipes and a small trash can right next to the stool. The goal of this station is to make “getting ready” a series of steps they can do without you saying a word. When Maya could go from bed to fully washed and brushed without me hovering, our mornings became 100% more peaceful.
8. The “Plant Doctor” Watering Station
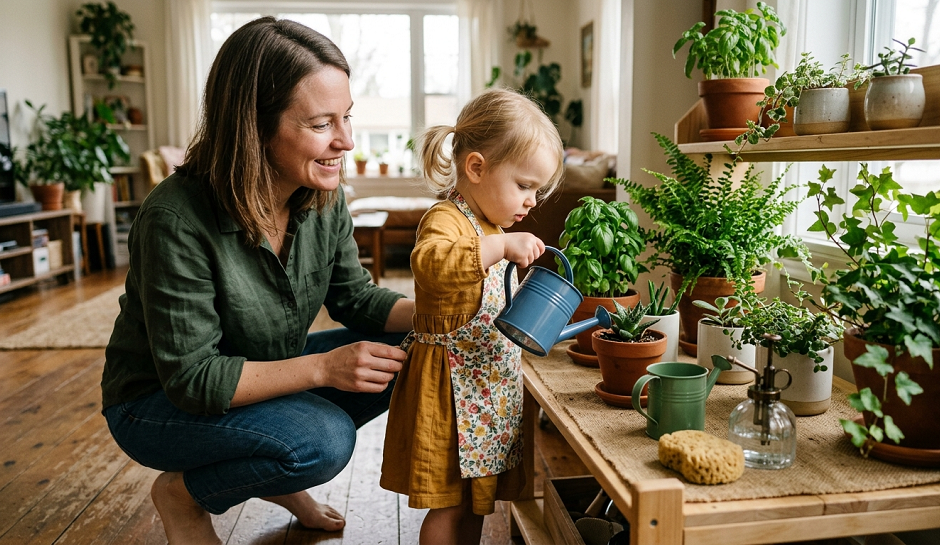
Teaching empathy starts with caring for something that can’t speak. We had a dedicated “Plant Doctor” station on the windowsill. It consisted of a very small watering can (the kind with a long, thin spout to prevent splashing) and a misting bottle.
I am firmly against “fake” plants in a kid’s room. Kids need to see the result of their care. If they forget to water it, the plant wilts. That is a natural consequence. I chose hardy plants like Pothos or Spider plants that can handle a bit of “over-loving” or a few days of neglect.
Sarah took this job very seriously. She had a little chart where she’d put a green dot every time she checked the soil. This station isn’t just about chores; it’s about observation. It teaches them to look for “needs.” Is the soil dry? Are the leaves dusty?
I’ve found that giving a child a “living” chore changes their perspective on the “static” chores. When they see themselves as a “caretaker” of a plant, they start to see themselves as a caretaker of the home. It shifts the identity from “kid who has to clean” to “person who keeps things alive and beautiful.”
9. The “Fix-It” Tool Kit Station
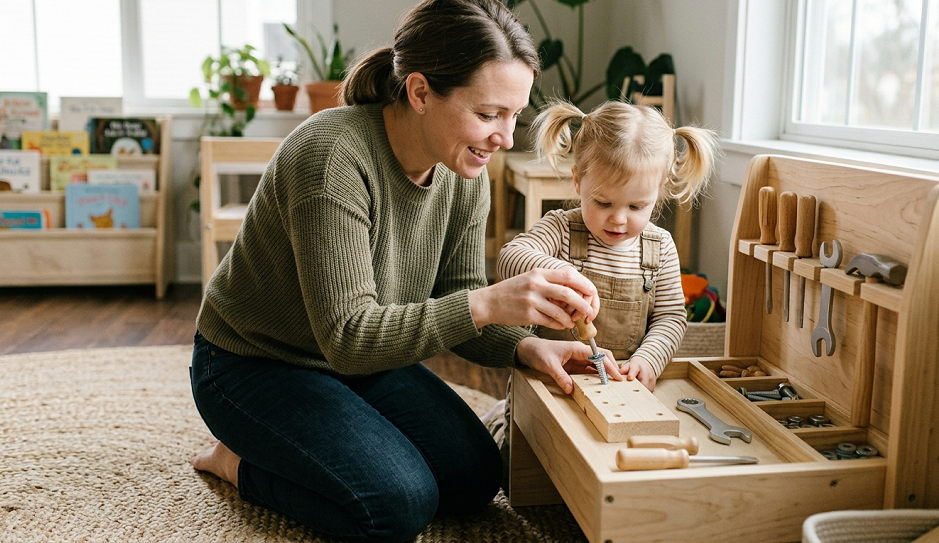
Leo was a “destroyer.” He wanted to take everything apart. Instead of fighting that urge, I leaned into it. We created a “Fix-It” station in the garage (and later a smaller version in the kitchen). It wasn’t a toy set; it was a small real hammer, a screwdriver, and a level.
Now, I know some parents are cringing at the idea of a toddler with a hammer. But I’ve found that when you give a child a real tool and show them the “danger” and the “utility,” they respect it. We had a “pounding board” (a piece of soft foam or cork) where he could hammer nails to his heart’s content.
This station was also the “recycled materials” hub. If a toy broke, it went to the Fix-It station. We would look at it together. “Can we glue this? Do we need a screwdriver?” It taught him that we don’t just throw things away; we maintain them.
By giving him a constructive outlet for his “destructive” energy, the power struggles over him “messing with things” disappeared. He had his own things to mess with. He felt powerful and capable because he was trusted with “adult” tools.
10. The Bedtime “Reset” Basket
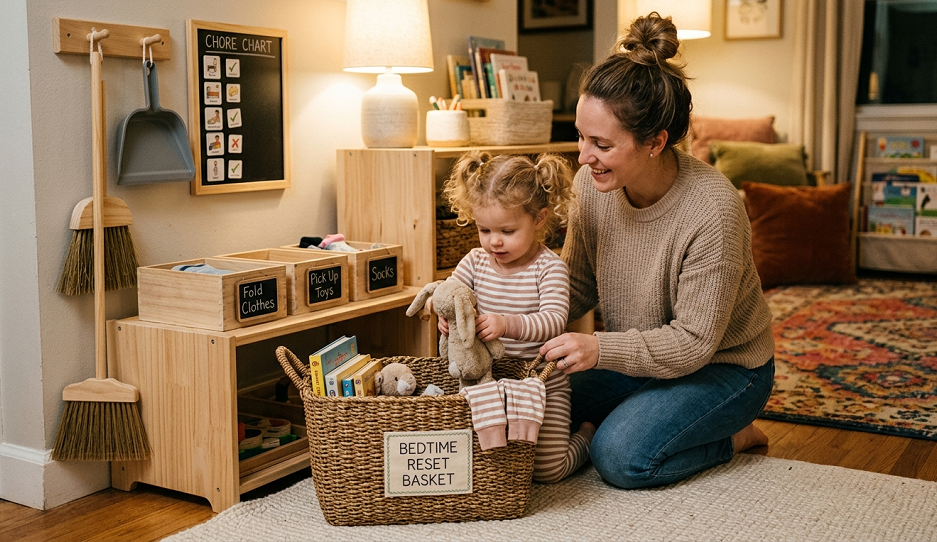
The end of the day is when power struggles peak. Everyone is tired, and “clean up your room” sounds like an impossible Everest to a tired child. We implemented the “Reset Basket.” This was a simple wicker basket that lived in the center of the living room.
The rule was simple: At 7:00 PM, we do a “5-minute sweep.” Anything that doesn’t belong in the living room goes into the Reset Basket. We don’t worry about putting things away in their “perfect” spots yet; we just clear the common space.
I’ve discovered that breaking “cleaning” into two phases—gathering and distributing—is much easier for the child’s brain to process. Once the living room was clear, we carried the basket to the bedrooms. Sarah would take her items, Maya hers, and Leo his.
This prevented the “I don’t want to go back and forth” whining. One trip, one basket, done. It turned the end-of-day chaos into a predictable rhythm. It also meant that I woke up to a clean living room, which did wonders for my own mental health.
Real Talk: When the Stations Fail
I’m not going to lie to you and say my house looked like a catalog. There were days when the “Hydration Station” was an indoor lake. There were times when Sarah used the “Spray and Wipe” caddy to “clean” the cat.
The biggest mistake I made—and I see parents making it all the time—is thinking that setting up the station is the end of the work. It’s actually just the beginning. You have to “model” the station for weeks. You have to be okay with the fact that it will be messy and imperfect.
If you are a “perfectionist” parent, these stations will be hard for you. You have to learn to close your eyes to the crookedly folded towels. If you step in and “fix” their work, you are essentially telling them, “Your help isn’t good enough.” Eventually, they will stop trying. It’s better to have a messy house and a confident child than a pristine house and a child who feels incompetent.
Also, don’t try to set up all ten stations in one weekend. You’ll burn out and the kids will be confused. Pick one. Start with the shoes or the water. Master that rhythm for two weeks, then add another. Slow and steady wins the parenting race.
Parting Wisdom
The goal of a Montessori-style home isn’t to create a “useful” child who does your chores for you. The goal is to create a child who feels like a necessary, valued member of the “tribe.” When Sarah, Maya, and Leo headed off to college, they knew how to boil an egg, do their laundry, and fix a loose screw. But more importantly, they knew that they were capable of handling whatever mess life threw at them.
You aren’t failing because your toddler is screaming about their socks. You’re just in the middle of a very long, very loud lesson in independence. Give them the tools, lower the hooks, and take a deep breath. You’ve got this.
Which of these stations do you think would help your “witching hour” the most? Are there any chores your kids actually enjoy doing? Let’s swap stories in the comments below—I’d love to hear what’s working (and what’s definitely not) in your house!