
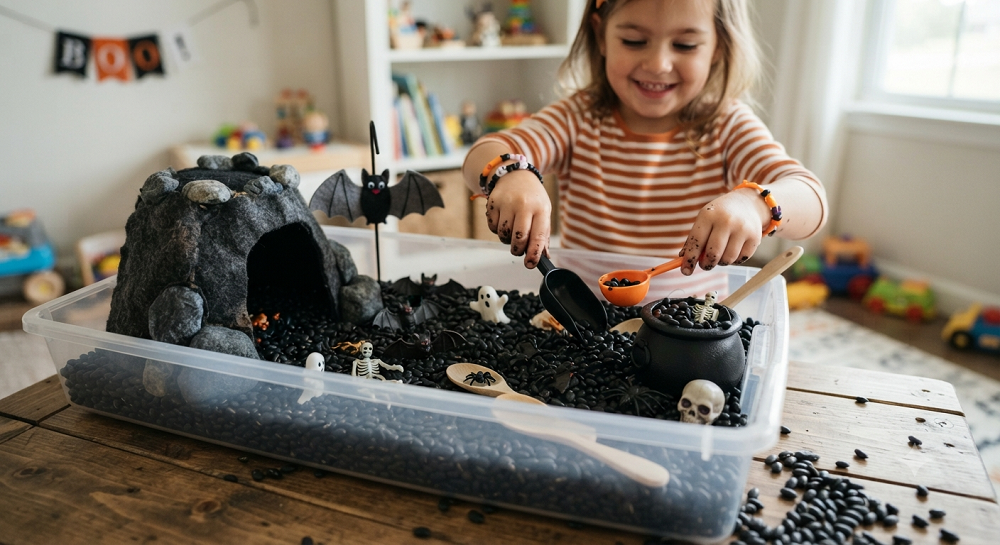
My daughter Maya once dumped an entire bag of dried black beans across my kitchen floor at 7 a.m. because she wanted to “find the spiders” faster than her sister. I stood there in my socks, coffee in hand, staring at a floor that looked like it had been hit by a tiny brown blizzard, and I had two choices. I could lose it, or I could laugh and hand her a broom “helper job.” I laughed. Barely.
That morning taught me something every parent of a toddler, preschooler, or bored elementary kid eventually learns the hard way: sensory bins are magic, but only if you set them up smart. A bad sensory bin turns into a floor disaster and a meltdown when the fun runs out in four minutes. A good one buys you twenty, thirty, sometimes forty-five glorious minutes of quiet, focused play while you actually get to drink your coffee hot.
Halloween sensory bins are some of my favorites of the whole year. The colors are rich, the textures are fun and a little creepy, and kids this age are obsessed with anything spooky-but-safe. Below are eleven ideas I’ve either used myself with Sarah, Maya, and Leo, or tested with my grandkids more recently. I’ll tell you what worked, what flopped, and how to keep the cleanup from becoming its own horror story.
What Makes a Good Halloween Sensory Bin (Before We Get Into the List)
Before you raid the craft aisle, let’s talk basics. A sensory bin is really just a contained space filled with a “base” material, like rice, beans, or shredded paper, plus small objects for kids to dig through, sort, or scoop.
I’ve found that the bin container matters way more than people think. A shallow, wide plastic storage bin works better than a deep one. Kids can’t see or reach the bottom of a deep bin, and that’s when the frustration starts. Aim for something under six inches deep with a solid, flat bottom.
Here’s my other non-negotiable: always put a towel, shower curtain, or old bedsheet under the bin before playtime starts. This one habit alone has saved me hundreds of hours of vacuuming rice out of carpet fibers. Trust me on this one.
Age matters too. If you’ve got a child under three who still puts everything in their mouth, skip the small beads and mini erasers. I’ll flag which bins are safer for younger kids as we go.
1. Spooky Spider Rice Bin
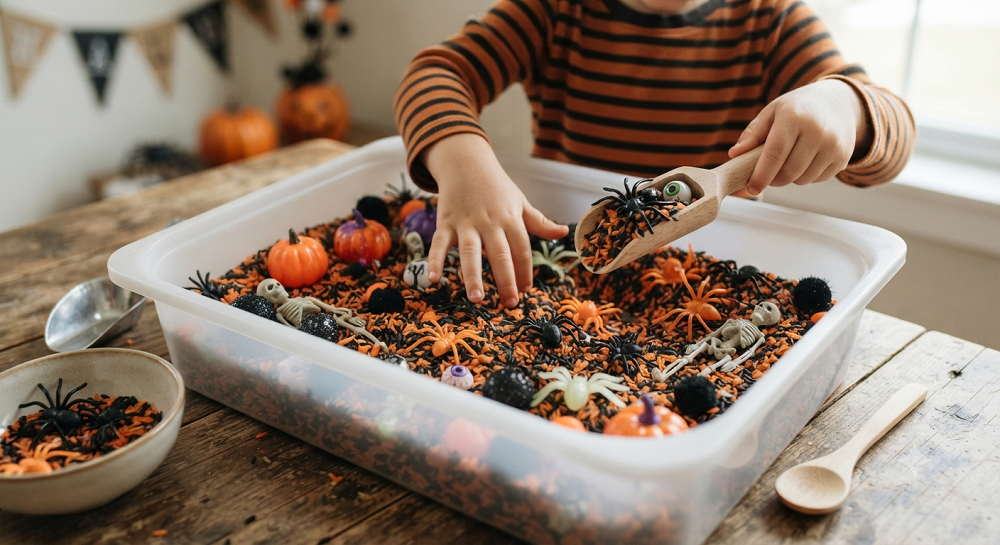
This was the bin that started it all in my house, and it’s still the one I recommend first to new parents. You dye a big batch of white rice black or purple using food coloring and a splash of rubbing alcohol, let it dry overnight, then toss in plastic spider rings and a few fuzzy fake spiders.
Kids love hunting for the spiders buried in the rice with their fingers or a small scoop. It works for a huge age range too, from toddlers who just want to squish rice through their fists, to six-year-olds who want to count exactly how many spiders they found.
One tip I picked up after ruining my first batch: dye the rice in a gallon zip bag, not a bowl. Squeeze the color through the bag instead of stirring with a spoon. It distributes way more evenly and your hands stay clean.
Skip this one if you have a child under two who mouths everything, since loose rice is a choking hazard. For that age group, jump down to idea number nine instead, which uses a safer base.
2. Pumpkin Guts Exploration Bin
Real pumpkin guts are messy, smelly, and honestly one of the best sensory experiences you can offer a kid, seeds and all. I used to carve pumpkins with my three every October, and the guts always got tossed straight in the trash until I realized they were basically a free sensory activity.
Scoop the seeds and stringy pulp into a large bin, add a few plastic spoons and small cups, and let your kid dig through it. The texture is slimy, cold, and totally unlike anything else they’ll touch that week. Some kids squeal and back away. Others get their whole arm in up to the elbow.
I always set this one up outside or in the garage. Pumpkin guts stain, and the smell lingers if it sits too long indoors. Give your child an apron or an old t-shirt they don’t care about, because this activity does not stay contained no matter how hard you try.
If your kid is squeamish about the texture, that’s completely normal and not something to push through. Some children need three or four exposures to slimy textures before they warm up. Offer it once, don’t force it, and try again next year if they’re not into it.
3. Candy Corn Sorting Bin
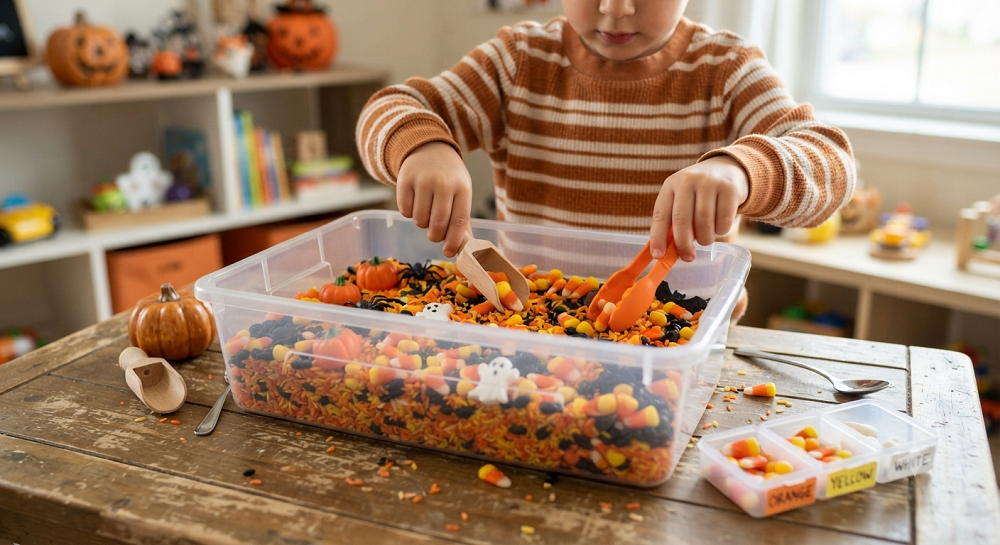
This one is less about digging and more about fine motor skills and early math. Fill a bin with dried corn kernels or yellow-dyed rice as the base, then add a mix of real candy corn, felt candy corn shapes, or small orange and yellow pom-poms.
Give your child small bowls or an ice cube tray and ask them to sort by color, by size, or just scoop and pour. This bin quietly builds pincer grasp and hand-eye coordination while your kid thinks they’re just playing with candy.
I want to be honest here: if you use real candy corn, expect some of it to get eaten mid-play. That’s fine in small amounts, but I always keep a separate “eating bowl” off to the side so the sensory pieces don’t all disappear into little bellies before the activity is even done.
For a food-free version, craft stores sell mini pom-poms in the exact candy corn colors for a few dollars a bag. That’s what I use now with my grandkids, since it lasts forever and doesn’t attract ants.
4. Glow-in-the-Dark Ghost Bin
Kids are endlessly fascinated by anything that glows, and this bin takes a normal rice or bean base and turns it into something that feels like actual magic once the lights go off. Use white rice or white beans as your base, add small glow-in-the-dark stars or ghost-shaped erasers, and charge everything under a bright lamp for a few minutes before playtime.
Turn off the lights, hand your kid a flashlight, and watch them go quiet with focus as they hunt for the glowing pieces. This is one of the few sensory bins that works just as well for a rowdy seven-year-old as it does for a calmer toddler, because the novelty of the dark room does a lot of the heavy lifting.
A quick side note here: the glow only lasts about ten to fifteen minutes before it fades, so this bin has a natural built-in end time, which some parents actually prefer. No fighting about when playtime is over. The lights just fade, and that’s your cue.
Recharge the glow pieces under a lamp between play sessions rather than sunlight, since artificial light works faster and you won’t be waiting around outside in October weather.
5. Witch’s Brew Cauldron Bin
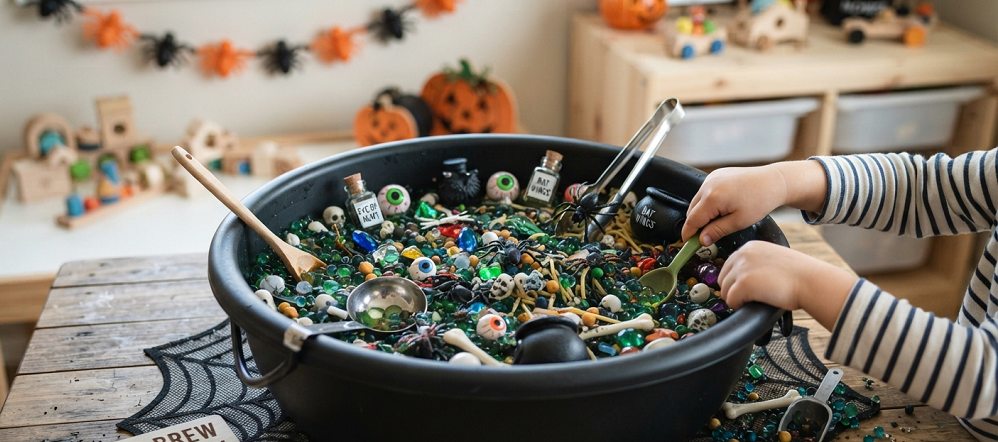
Grab a plastic cauldron from the dollar store, or honestly just use a black mixing bowl, and fill it with cooked spaghetti noodles dyed green for “witch hair,” plus peeled grapes for “eyeballs” and a few plastic frogs or bats.
This bin leans hard into gross-but-safe play, and kids this age absolutely eat it up, pun intended. The cold, slippery noodle texture combined with the squishy grapes gives a totally different sensory experience than dry rice or beans.
I do want to flag one thing: peeled grapes are a choking hazard for kids under four, so quarter them lengthwise if you’ve got a younger sibling nearby, even if the bin is meant for an older child. Little ones wander over and grab things, that’s just how it goes.
This bin doesn’t keep well overnight since the noodles get slimy and start to smell by the next day. Plan to make it and use it the same day, then toss it. It’s a one-and-done activity, not a leave-it-out-for-a-week kind of bin.
6. Mummy Wrap Bin
This is less of a traditional bin and more of an activity station, but it fits the sensory category perfectly and my kids loved it every single year. Fill a bin with a soft base like shredded paper or cotton balls, then add several rolls of white gauze, medical tape, or even toilet paper.
Give your child a small plastic figure, a doll, or even a willing sibling, and let them practice wrapping it up like a mummy. This builds fine motor control in a completely different way than scooping or sorting, since wrapping requires two-handed coordination and a bit of patience.
I’ll be honest, this one is less about the bin itself and more about the wrapping practice. Some kids get frustrated fast if the gauze keeps slipping. Start them off with a big, easy object like a stuffed animal before moving to something smaller and trickier like a small figurine.
Keep a roll of masking tape nearby too. It’s more forgiving than medical tape for little hands still learning how much pressure to use.
7. Bat Cave Black Bean Bin
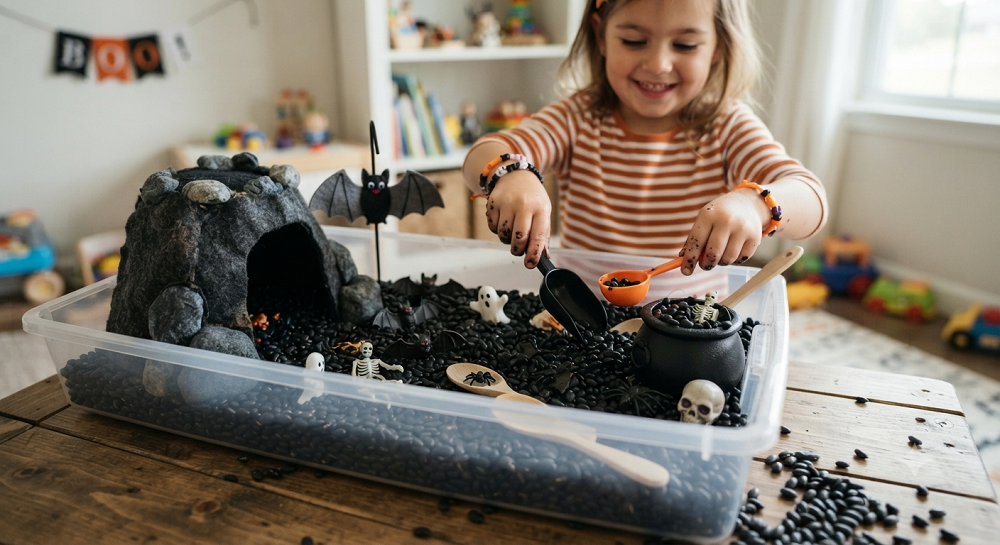
Dried black beans make a fantastic, budget-friendly sensory base, and they’re naturally the right color for a “cave” theme without any dye needed. Fill your bin with black beans, then add small rubber bats, plastic gems for “cave crystals,” and a few small flashlights.
Kids can dig for bats, sort gems by color, or just enjoy the deep, satisfying sound and feel of beans running through their fingers. I’ve found that black beans are one of the more durable bin bases too. Unlike rice, they hold their shape and don’t turn to dust after a few play sessions.
One thing I always mention to new parents: black beans stain light-colored carpet if left wet or damp, so keep this one strictly for a dry indoor space or an easy-to-clean outdoor table. A damp bean left under a couch cushion for two weeks is not a mystery you want to solve later.
Store leftover beans in a sealed container between uses. They’ll last for months of repeat play, which makes this one of the more cost-effective bins on this whole list.
8. Skeleton Bone Dig Bin
This bin turns your kid into a tiny archaeologist for an afternoon, and it’s one of the few that keeps older kids, ages six through nine, just as engaged as younger ones. Use kinetic sand, sand, or even flour as your dig base, then bury small plastic skeleton bones throughout.
Hand your child a small paintbrush and a magnifying glass, and let them “excavate” the bones one at a time, brushing away the sand like they’re on a real dig site. This slows kids down in a really good way. Instead of frantic digging, they focus and work carefully, which is honestly rare for this age group.
I’ve tried this with both sand and flour, and I have a strong opinion here: flour is a total mess and I don’t recommend it, even though it’s cheaper. It clumps, it gets everywhere, and it doesn’t rinse off skin the way sand does. Spend the few extra dollars on actual play sand or kinetic sand instead. Future you will be grateful.
For extra engagement, print a simple “skeleton map” showing where the bones go once found, so kids can assemble the full skeleton on a poster or table as they dig each piece out.
9. Toddler-Safe Pumpkin Sensory Bin (Oat Base)
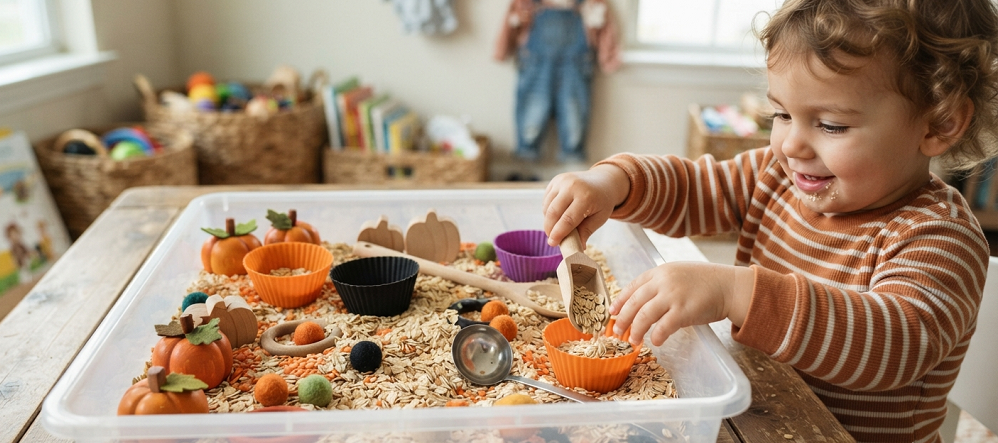
I promised I’d flag a safer option for younger kids, and this is it. Dried oats make a fantastic base for toddlers because they’re too big to be a serious choking risk, they’re soft on little hands, and if a bit ends up in a mouth, it’s just an oat.
Dye the oats orange using food coloring, and toss in a few large plastic pumpkins, big wooden spoons, and stacking cups. Skip anything small enough to fit through a toilet paper tube, that’s my go-to rule of thumb for toddler safety with any sensory bin.
Toddlers this age aren’t really “playing” with a bin the way older kids do. They’re mostly scooping, dumping, and repeating the same motion over and over. That repetition is exactly what builds their motor skills, so don’t worry if it looks boring to you. Boring to us is often exactly right for them.
I’d still recommend supervising the whole session with a child under two, not because oats are dangerous, but because toddlers put everything near their face without warning, and it’s better to be right there.
10. Haunted House Rainbow Rice Bin
This one skips the black-and-orange color scheme entirely and goes full rainbow instead, which surprised me the first time I tried it but ended up being a huge hit. Dye separate batches of rice in purple, green, orange, and black, then layer them in the bin instead of mixing them together.
Add small plastic haunted house figures, tiny bats, and a few mini flashlights for kids to shine through the colored layers. The layered rainbow effect is genuinely beautiful, and it gives kids a chance to notice color patterns as they dig, which is a nice bonus for anyone working on early color recognition.
This bin takes longer to prep than most on this list, since you’re dyeing four separate batches instead of one. I usually do this the night before over a glass of wine while half-watching a show, because it’s a bit of a project. Don’t attempt this one the morning you actually want to use it.
Once it’s made though, it lasts. Store it in an airtight container and it’ll be ready to go for multiple play sessions across the whole month of October.
11. Spider Web Sensory Bin (Cotton Ball Base)
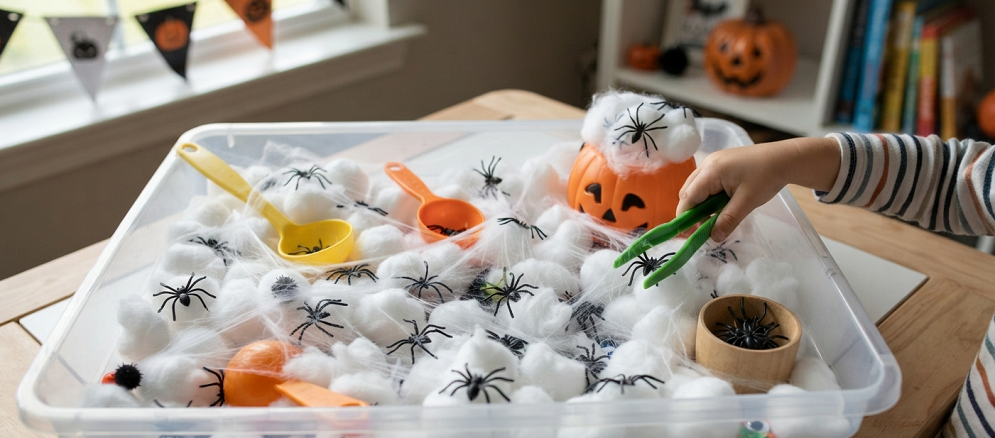
Fill a bin with plain white cotton balls to mimic spider webs, then scatter plastic spiders, spider rings, and small black pom-poms throughout. This is one of the softest, gentlest bins on the whole list, which makes it a great choice for a child who gets overwhelmed by louder textures like dried beans or rice.
Kids can stretch the cotton balls apart to build their own “webs,” hide spiders inside the fluff, or just enjoy the soft texture between their fingers. I’ve used this one specifically with kids who have sensory sensitivities, and it tends to go over well because there’s no scratchy or gritty feeling involved.
Add a few plastic tweezers or tongs if you want to sneak in some extra fine motor practice. Picking spiders out of cotton fluff with a small tool is trickier than it sounds and keeps kids focused a good while longer than bare hands alone.
Cotton balls don’t hold up well to repeat use once they get pulled apart and fluffed out too many times. This is more of a one or two session bin before you’ll want to refresh it with a fresh bag.
Real Talk: What Can Go Wrong With Halloween Sensory Bins
Let’s be honest about the parts nobody puts in the cute blog photos. Sensory bins are not always the peaceful, magical experience Pinterest promises, and I don’t want you thinking you’re doing something wrong when it gets messy or falls flat.
First, the mess is real. Rice gets in carpet. Beans roll under the fridge. Pumpkin guts stain grout. If you skip the towel-under-the-bin step, you will be finding stray rice grains for weeks. I still find them sometimes, and my kids are grown.
Second, not every bin lands with every kid. I’ve set up gorgeous bins that my son Leo touched for ninety seconds before wandering off to build a fort with couch cushions instead. That’s not failure. Kids have their own preferences and sensory needs, and forcing engagement usually backfires into a meltdown.
Third, siblings fighting over the “good spiders” or the one flashlight is basically guaranteed. Buy duplicates of the popular small objects if you’re setting a bin up for more than one child at a time. It’s cheap insurance against an argument you don’t have the energy for at 4 p.m. on a Tuesday.
Finally, don’t feel obligated to make every bin from scratch with dyed rice and homemade props. Pre-made Halloween sensory bin kits exist, and there’s zero shame in grabbing one if you’re short on time. A tired parent handing over a store-bought bin is still giving their kid a wonderful, hands-on experience.
Final Thoughts
Sensory bins aren’t about creating a picture-perfect activity that looks impressive on social media. They’re about giving your kid a safe, contained way to explore, focus, and burn off some of that restless October energy while you get a few quiet minutes for yourself.
Some bins will be a hit. Some will get ignored after two minutes. Both outcomes are completely normal, and neither one means you did something wrong. You’re not failing at this parenting thing. You’re just figuring out what your particular kid needs, one messy bin at a time.
Which one of these are you trying first, and did I miss your family’s favorite Halloween sensory bin idea? Drop it in the comments below. I read every single one, and I’m always looking for new ideas to steal for my grandkids.