

Every parent of a toddler has had that moment. You turn your back for thirty seconds—thirty seconds—and your child has shoved a handful of kinetic sand into their mouth like it’s a snack. Or maybe it was playdough. Or worse, that mystery chunk of something you found fossilized under the couch cushion.
With my youngest, Leo, it was a glob of purple cloud dough I’d worked so hard to set up. He took one look at it and treated it like a buffet. My eldest, Sarah, was a handful-of-soil-from-the-garden girl. Maya? She had a thing for crayons. Every single one. The smell, the waxy texture—she was committed.
Here’s the truth no Pinterest board tells you: toddlers mouths things because that’s how their brains are wired. It’s called mouthing, it’s developmentally normal, and it doesn’t mean you’re failing. But it does mean you need sensory play ideas that won’t send you racing to Poison Control.
That’s exactly what this list is for. These are the 11 taste-safe sensory play ideas I’ve tested, recommended, and sworn by over the years. Some of them have saved my sanity. A couple surprised me. And I’ll be honest with you about the ones that aren’t worth the hype.
Why Taste-Safe Sensory Play Matters for Toddler Development
Before we get into the good stuff, I want to take a quick moment here—not to lecture, but to anchor you. Sensory play isn’t just a fun Instagram activity. For toddlers, engaging their senses is how they build neural pathways. Touching, smelling, tasting, and manipulating materials helps develop fine motor skills, language, problem-solving, and emotional regulation.
The mouth, for children under three especially, is one of their most powerful sensory tools. Oral exploration is how they gather information about texture, temperature, and density. So when your toddler tastes the sensory bin, they’re not being naughty. They’re being a scientist with a very small, very enthusiastic lab.
The goal of taste-safe sensory play is to create environments where that scientific curiosity can run wild—without the risk.
1. Edible Finger Paint Made with Yogurt or Pudding
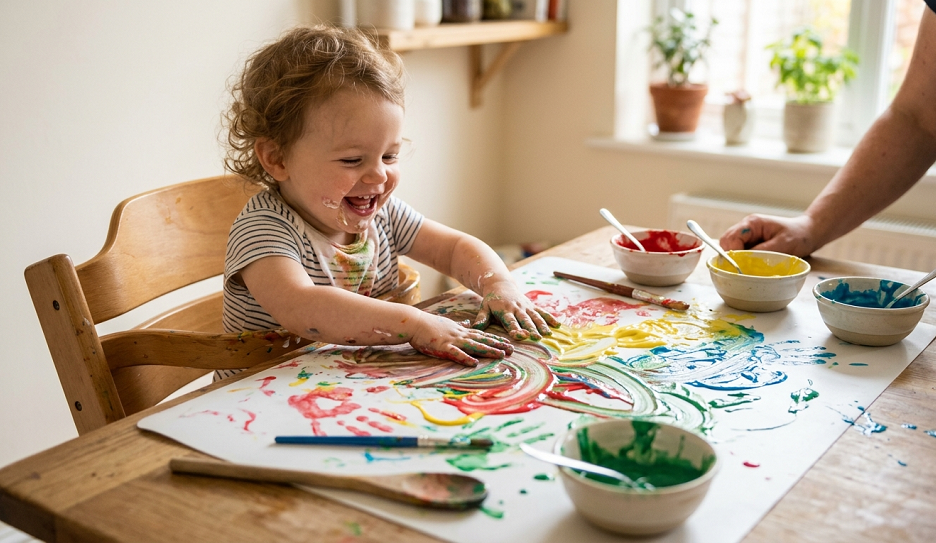
What it is: Plain Greek yogurt or vanilla pudding mixed with food coloring makes a perfectly safe, squishy, colorful paint for little hands.
This was my go-to when Leo was around 18 months old and in the thick of mouthing everything in sight. He’d paint on paper, on his high chair tray, occasionally on the dog—and when he inevitably stuck his fist in his mouth, I didn’t even flinch. The beauty of yogurt paint is that it’s cold, which toddlers find fascinating. The texture is thick enough to leave marks but smooth enough to spread easily with little fingers.
I’ve found that plain, unsweetened Greek yogurt works better than vanilla pudding if your toddler has a sensitive stomach, because you can control exactly what goes in it. Pudding is fine for a one-time activity, but I wouldn’t set it up twice a week. The sugar content is real, and you’ll be scraping your toddler off the ceiling by naptime.
Use gel food coloring rather than liquid. It gives a richer, more vibrant color with far less dye—meaning less of everything ends up in your child’s system. Set up on a wipeable surface, strip them down to a diaper if you can, and let them go wild. Cleanup is honestly the best part; a warm washcloth and you’re done.
2. Cooked Oatmeal Sensory Bin
What it is: Plain cooked oatmeal (cooled to room temperature) poured into a shallow bin, sometimes with additions like banana slices or blueberries hidden inside.
This one is criminally underrated. I’ve recommended cooked oatmeal sensory bins to dozens of parent friends, and every single one of them has come back with some version of “Why didn’t you tell me about this sooner?” Oatmeal has an incredible range of textures depending on how it’s cooked—thick and sticky, or thin and pourable. Both are sensory gold.
The key is to cook it plain—no salt, sugar, milk, or honey (remember, no honey under 12 months). Just oats and water. Let it cool completely before playtime. Your toddler can poke it, squeeze it through their fingers, scoop it with spoons, and yes, eat some of it. That’s fine. That’s the whole point.
To extend the activity, I love burying small, safe items inside—a blueberry, a piece of banana, a raspberry. Turning it into a “treasure hunt” keeps toddlers engaged for 20 to 30 minutes, which in toddler time is basically an eternity. I’ve seen kids completely zone into this activity in a way that almost looks meditative. It’s genuinely beautiful to watch.
One practical note: do this activity before bath time. Oatmeal dries sticky and slightly crusty, and you don’t want that in your carpet. High chair tray, plastic tablecloth on the floor, or outside on the patio are your best setups.
3. Edible Cloud Dough (Coconut Oil + Flour)
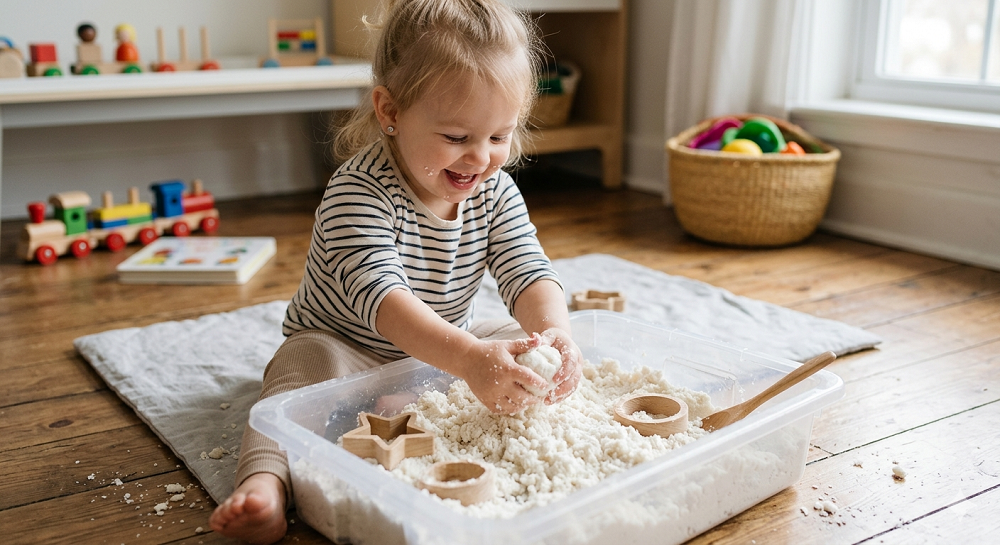
What it is: Two simple ingredients—plain flour and coconut oil—mixed to create a moldable, crumbly dough with a satisfying texture.
The ratio is roughly 8 parts flour to 1 part coconut oil. Mix with your hands until it clumps when squeezed but crumbles when you let go. That paradox—firm yet fragile—is what makes it irresistible to little hands. It feels powdery, smells faintly of coconut, and behaves in this magical in-between way that regular playdough doesn’t.
Now, here’s my honest take: traditional cloud dough recipes use baby oil, and I’ve seen them plastered all over parenting blogs as “safe.” I think this is a total waste of time—and borderline dangerous if your child mouths the material, because baby oil is not meant to be ingested. The coconut oil version takes the same five minutes to make and is genuinely edible. It’s a no-brainer swap.
The downside of this activity is mess. Flour gets everywhere. I’m not sugarcoating that. But if you lay down a plastic tablecloth or a shower curtain liner (one of my favorite cheap parenting hacks), cleanup is manageable. Add small scoops, cookie cutters, or a muffin tin to give your toddler tools, and suddenly you have an open-ended activity that builds fine motor skills while they dig and press and squish.
Coconut oil cloud dough keeps in an airtight container for a few days. If it dries out, just add a tiny bit more oil and knead it back to life.
4. Cooked Spaghetti Sensory Play
What it is: Plain cooked pasta—spaghetti works best—tossed with a little olive oil and served in a bin or directly on a tray for pulling, stretching, and yes, eating.
This one shocked me the first time I saw it work. Maya was 20 months old and in a particularly intense mouthing phase. I’d been stressing about giving her sensory experiences that wouldn’t land us in the ER, and I had pasta on the stovetop anyway. I cooked up a plain batch, let it cool, drizzled it with a bit of olive oil so it wouldn’t clump, and put it in a shallow plastic tub.
She was transfixed for nearly 40 minutes. She pulled it, dropped it through her fingers, wound it around her wrist like a bracelet, and ate probably a third of it. No drama, no panic, no Poison Control. Just a toddler absolutely in her element.
You can add safe food coloring to the cooking water if you want to make it more visually interesting—or cook a few different batches in different colors for a rainbow effect. Keep it plain (no salt) so it’s comfortable for them to eat freely. Pair it with spoons, tongs if your child is older, or ice cube trays for transferring pasta bits in and out.
For extended play, hide some small soft items in the bin—a piece of cooked carrot, a small meatball, a cherry tomato. The textural contrast keeps little brains busy.
5. Frozen Fruit in Ice Blocks (Sensory Ice Play)
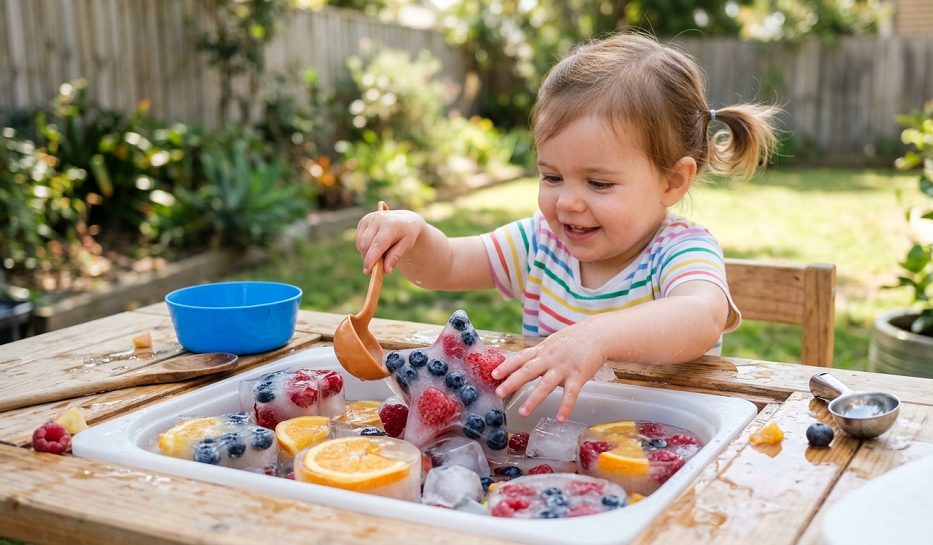
What it is: Fruit pieces frozen inside blocks of ice that toddlers chip away at, melt with their hands, or simply gnaw on directly.
This is one of my absolute favorites for hot days. Fill a shallow container or muffin tin with water, add blueberries, raspberry halves, or small pieces of strawberry, and freeze overnight. Pop them out the next day and let your toddler go to town.
The experience is multi-sensory in the best possible way. Cold is a powerful sensory input for toddlers—it demands attention. The ice melts, changes shape, gets slippery, drips. The fruit becomes accessible as it thaws, creating little reward moments that keep engagement going. And if your child pops a blueberry in their mouth? Perfect. That’s a snack.
I’ve found this works exceptionally well for teething toddlers who are also in the mouthing phase. Two birds, one stone. I used this with all three of my kids during those painful 18-to-24-month teething stretches, and it was a lifesaver on hot afternoons when everyone’s patience was thin.
Set this up outside or in the bathtub. I made the mistake of doing it on my kitchen floor once. The puddles were impressive.
6. Taste-Safe Sensory Bins with Dry Cereal or Puffed Grains
What it is: Large bins filled with puffed rice cereal, Cheerios, corn puffs, or similar whole-grain toddler-safe cereals for scooping, pouring, and digging.
Here’s where I’ll push back on a common piece of sensory play advice: many blogs recommend dry rice or dried beans as sensory bin filler, and I’ve found this to be a genuinely risky call for toddlers under three. Rice and beans are choking hazards. Full stop. I’ve seen parents justify it because “I was right there,” but accidents happen in seconds.
Toddler-safe puffed cereals dissolve quickly in the mouth, making them dramatically safer. They still provide that satisfying pour-and-scoop sensory experience, they make a wonderful sound, and they don’t present the same hazard. Yes, you’ll sweep up cereal dust afterward. Worth it.
Add scoops, measuring cups, small bowls, and a toy funnel to extend the play. Toddlers in the 18-to-30-month range are obsessed with transferring things from one container to another—it’s a developmental milestone known as “schema play,” and a cereal bin gives them endless practice. Swap in different cereals for different textures: puffed corn feels totally different from Cheerios, which feel different from puffed wheat.
7. Edible Moon Sand (Cornstarch + Water + Food Coloring)
What it is: A classic sensory substance—equal parts cornstarch and water—that behaves like a liquid when you pour it but a solid when you press it. Also called “oobleck.”
I cannot say enough good things about oobleck. It is, without a single doubt, the most fascinating sensory material I’ve ever put in front of a toddler. The science behind it is that it’s a non-Newtonian fluid—it resists pressure but flows freely when not compressed. Your toddler doesn’t know that. They just know it’s weird, and weird is the best thing in the world when you’re two.
Because it’s pure cornstarch and water, it is completely taste-safe. Add a drop of gel food coloring to make it visually striking—a deep blue or bright green makes it even more intriguing. Your toddler will pick it up, watch it flow through their fingers like liquid, smash it flat and feel it go solid, and probably get completely coated in it from the elbows down.
Do this one outside or in the bathtub. I’ll say it clearly: oobleck is not a kitchen table activity. It dries into a chalky powder that gets into everything, and cleaning it up while wet spreads it further. Let it dry and then sweep—that’s the actual cleanup trick. Water makes it worse.
This is a great activity to do alongside a toddler and an older sibling, because the older child will inevitably try to explain the science, and that peer teaching moment is magical.
8. Banana “Playdough”
What it is: Mashed ripe banana mixed with a small amount of oat flour to create a moldable, sweet-smelling dough that’s completely edible.
Two ripe bananas mashed smooth, mixed with roughly three tablespoons of oat flour (blend regular oats in a blender until fine), gives you a soft, pliable dough that smells incredible and tastes like banana bread. This is genuinely one of the most toddler-beloved sensory materials I’ve ever made.
The catch—and I’ll be straight with you—is that it doesn’t last long. Banana dough turns brown within a few hours and should be discarded the same day you make it. Make it fresh, play with it, compost it. It’s not a shelf-stable material, and I’ve discovered the hard way that day-old banana dough smells like a compost bin. Make it morning of.
Toddlers love the smell of this dough before they even touch it. The scent itself is a sensory experience—banana is a familiar, comforting smell for most kids. They’ll squish, roll, flatten, and almost certainly eat a significant portion of it. That’s fine. Oat flour and banana is essentially a snack.
9. Herb and Spice Sensory Bags
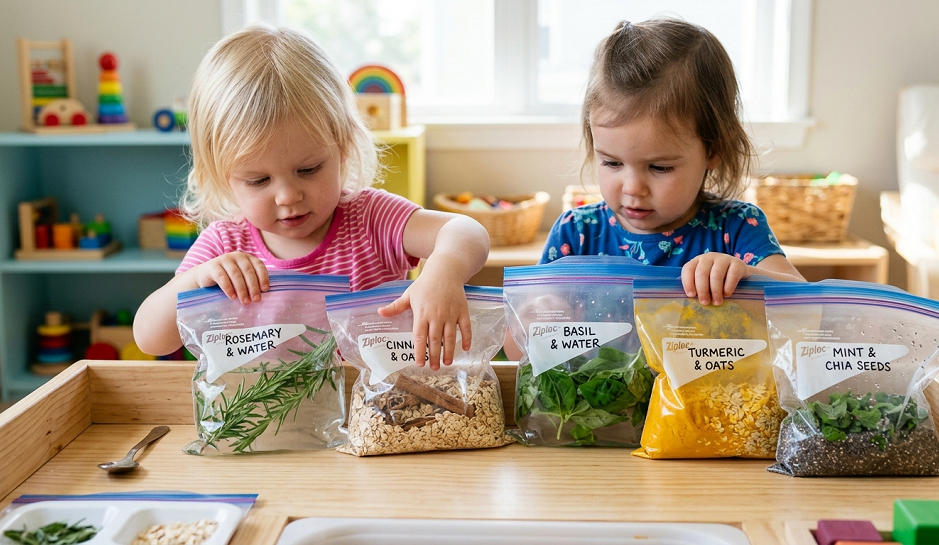
What it is: Sealed zip-lock bags filled with a small amount of safe dried herbs—lavender, cinnamon sticks, rosemary sprigs—that toddlers can squeeze, smell through the bag, and manipulate safely.
This one is more about smell as a sensory channel, which parents often overlook. Olfactory play is powerful—smell is the sense most directly linked to memory and emotion, and exposing toddlers to a wide range of smells early builds rich sensory vocabulary.
Fill a gallon-sized zip-lock bag with dried lavender and seal it tightly with tape around the zipper. Let your toddler squeeze it, press it flat, smell it through the bag. Try a cinnamon stick bag next, then one with dried rosemary. The textures feel different through the plastic, and the scents will stop them in their tracks every time.
I want to be clear: the bag stays sealed. This is handling play, not open sensory play. Some herbs and spices in large quantities are not appropriate for small children to eat freely. The plastic barrier is intentional. This is a supervision-required activity where the goal is tactile and olfactory input, not oral exploration. I’ve included it because most toddlers in the mouthing phase will chew on the outside of the bag, which is fine—they’re still getting the smell and the texture.
10. Water Bead Alternatives—Cooked Tapioca Pearls
What it is: Large tapioca pearls, cooked until translucent and jiggly, served in a shallow bin for poking, scooping, and squishing.
Every parent has heard of water beads—those gorgeous gel orbs that look like liquid jewels. And I have to be blunt: I think water beads are one of the most irresponsible sensory play recommendations circulating in the parenting space for toddlers under five. They are an ingestion and aspiration hazard. They expand dramatically in liquid, including in the digestive system, and there have been documented cases of emergency surgery after swallowing. Hard pass.
Cooked tapioca pearls give you the same visual magic and sensory experience—translucent, jiggly, cool to the touch—with zero risk. Cook large tapioca pearls according to package directions, rinse in cold water, and add food coloring if you’d like. The texture is smooth and slippery, the pearls bounce slightly when dropped, and the whole bin looks absolutely beautiful with multiple colors.
Yes, your toddler will eat some. Tapioca is food. It’s used in pudding. That’s the whole point of this swap.
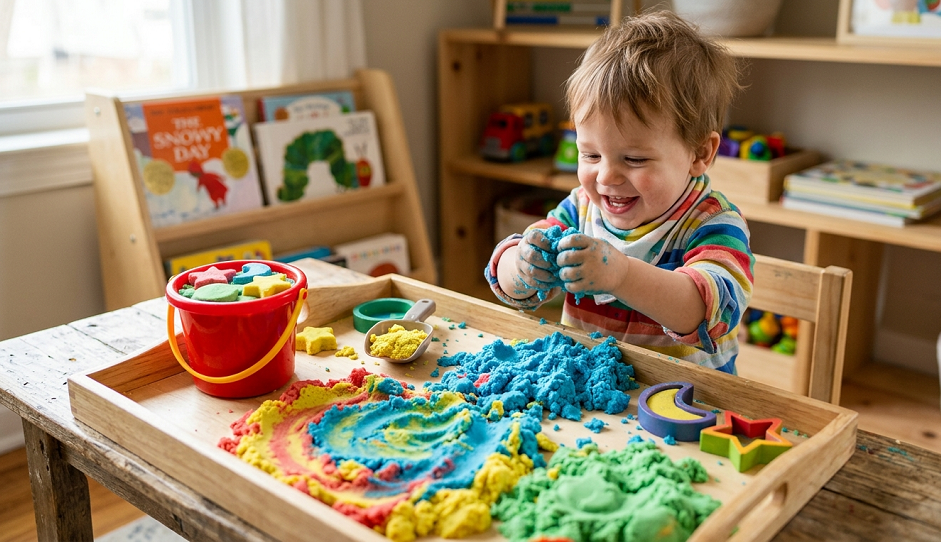
11. Edible Kinetic Sand (Flour + Fine Cornmeal + Oil)

What it is: A DIY mix of all-purpose flour, fine cornmeal, and a small amount of vegetable oil that mimics the satisfying, moldable quality of kinetic sand.
Mix two cups of flour with half a cup of fine cornmeal and two tablespoons of vegetable oil. Mix with your hands until it reaches that classic kinetic sand consistency—it holds a shape when packed but falls apart in a satisfying cascade when you release it. This is the most requested sensory material at every toddler playdate I’ve ever hosted.
The flour provides the sandy, powder-like base. The cornmeal adds a slightly gritty texture and a warm, grainy smell that’s very pleasant. The oil binds just enough to give it that “slow fall” kinetic quality. If it’s too crumbly, add oil a half-teaspoon at a time. Too sticky, add a bit more flour.
This keeps in an airtight container for about a week at room temperature, and you can refresh it with a small drizzle of oil if it dries out. Color it with gel food coloring kneaded in, or leave it natural for a beautiful sand-colored sensory experience.
The “Real Talk” Section: What’s Not Worth the Effort (And What Can Go Wrong)
Alright. I promised you honesty, so here it is.
Store-bought “natural” playdoughs are usually not taste-safe, even if the packaging implies otherwise. Many contain essential oils, cream of tartar, or salt levels that are genuinely dangerous if a toddler eats a significant amount. “Non-toxic” does not mean “edible.” Check every ingredient before assuming a product is safe for a mouthing toddler.
Glitter in sensory activities is a hard no for me with toddlers. Biodegradable or not, if your toddler is in a mouthing phase, glitter will end up in their eyes, nose, and mouth. It’s not worth the visual sparkle.
Sensory activities are not a set-and-forget solution. Every single activity on this list requires active supervision. I’ve seen parents set up a sensory bin, walk to the next room, and come back to a situation that needed a full clothing change and a stern conversation with themselves about supervision. Stay present. Sensory play is an engagement activity, not an independence activity for this age group.
The biggest mistake I made early on was over-complicating setups. I’d spend 45 minutes prepping an elaborate sensory bin and my toddler would engage with it for four minutes before being more interested in the empty container. Save your energy. Simplest is almost always best.
A Parting Word for the Parent Who’s Just Trying to Get Through the Day
Sensory play doesn’t have to be perfect. It doesn’t have to look like the photos you see online. It doesn’t require special equipment, elaborate setups, or hours of your time. A bowl of cooked oatmeal and a spoon is enough. A freezer bag of lavender is enough. A pot of cooked spaghetti and a curious toddler is absolutely enough.
You are not failing because your child puts everything in their mouth. You are not failing because your sensory bin ended up in your toddler’s hair, on the ceiling, and somehow inside their ear. You are learning—and so are they. That’s the whole point.
The fact that you’re reading an article about taste-safe options means you’re already doing something right. You’re thinking ahead, adjusting your approach, and meeting your child exactly where they are.
Now it’s your turn: Which of these have you tried with your toddler, and which one are you most excited to try first? Leave a comment below—I read every single one, and I’d love to hear what’s working in your house. If you’ve got a taste-safe sensory idea I haven’t mentioned here, share it. This community is better when we learn from each other.