
There comes a Saturday afternoon when you realize your child has been staring at a screen for two hours and you have no idea how it happened. One minute you were folding laundry, and the next, you’re watching your kid’s eyes go glassy in front of a cartoon that requires absolutely zero thinking from their brain.
I’ve been there. Three times over, actually.
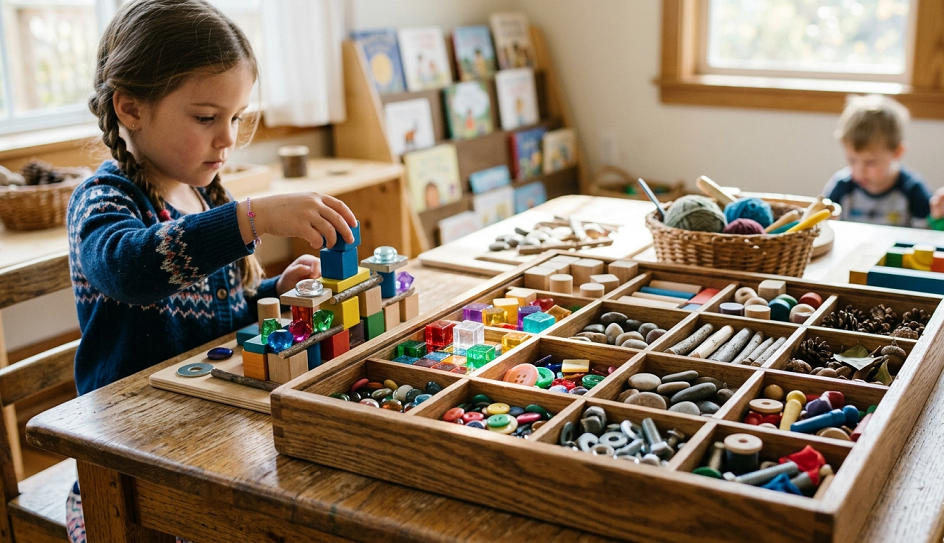
When my oldest, Sarah, was about four, I tried every “educational toy” on the market. Most of them were expensive, loud, and forgotten by Tuesday. It wasn’t until I started setting up simple, intentional play trays — shallow bins or trays filled with hands-on materials — that I noticed something change. She would sit. She would think. She would focus.
Then I did the same for Maya and Leo, and watched the same quiet magic happen each time.
Play trays are one of the most underrated tools in a parent’s toolkit. They’re low cost, low mess (mostly), and incredibly high impact when done right. But there’s a right way and a wrong way to set them up. I’ve done both, and I’ll be honest with you about what actually works.
What Are “Learning Through Play” Trays, and Why Do They Work?
A learning tray is simply a shallow container — a baking tray, a wooden tray, a plastic bin — filled with materials designed to invite a child to explore, sort, build, or solve a problem without you standing over them directing every move.
The science behind this is solid. Play-based learning builds neural pathways for problem-solving, pattern recognition, and sustained attention. But here’s what the parenting books often don’t tell you: the setup matters enormously. A tray full of random stuff is just a mess waiting to happen. A tray with intentional materials and a light prompt? That’s where the magic lives.
I’ve found that trays focused on logic and focus specifically — rather than just sensory play or creative art — are the ones that best prepare kids for the kind of thinking they’ll need in school and in life. Not because school is the goal, but because a child who can sit with a problem, turn it around in their mind, and work through it patiently is a child who feels capable. And that confidence? That carries them everywhere.
Let me walk you through the twelve trays I’ve used, tested, and (occasionally) failed with across three kids. And if you’re a busy mum, I have included Amazon links to some of these products, so you can order online at the comfort of your home.
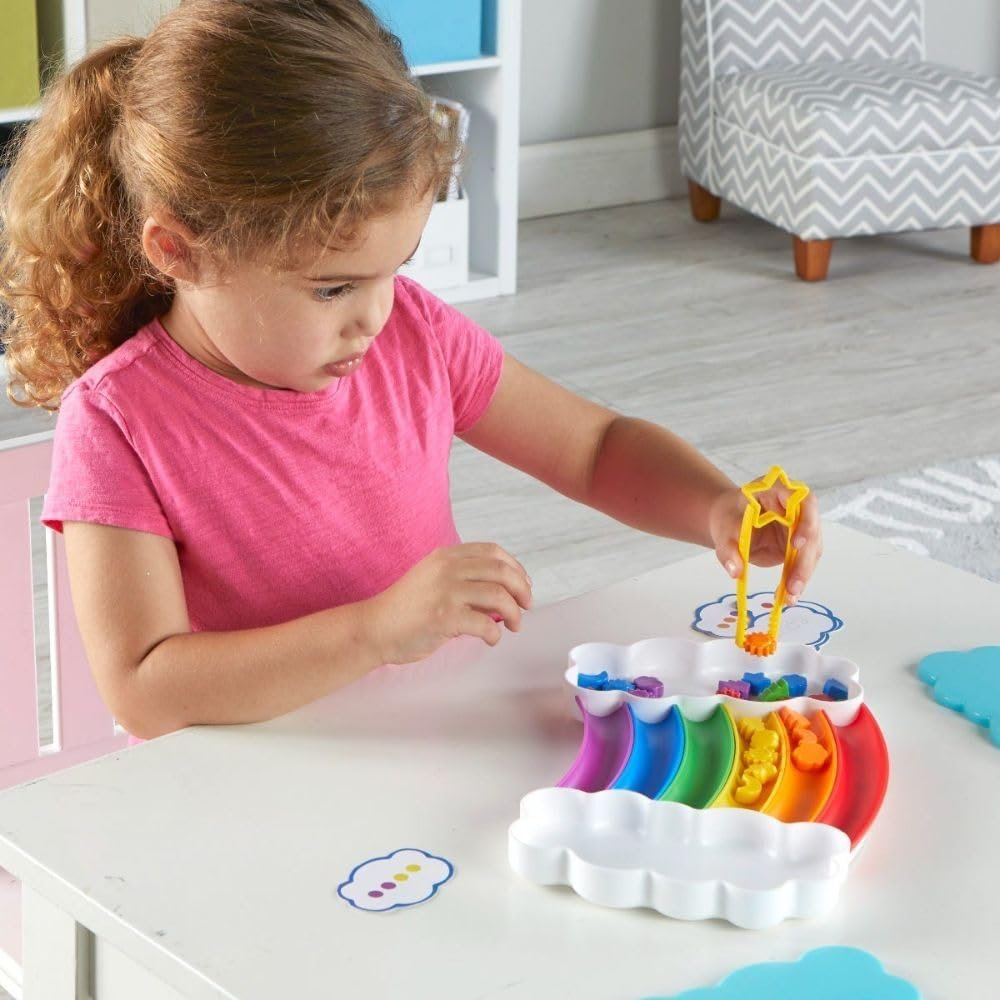
1. The Color Sorting and Pattern Sequencing Tray
Best age: 2–5 years
This is the tray I always start with, and I’d argue it’s the single most powerful tray for toddlers and preschoolers working on early logic and pattern recognition skills.
Set up a shallow tray with colored pom-poms, buttons, or wooden beads. Add small cups or muffin tin sections in matching colors. That’s literally it. The implicit “problem” — putting things where they belong — is one a young child understands instinctively.
Once they’ve mastered sorting, you graduate them. Line up a pattern starter: red, blue, red, blue — then stop. Leave the remaining materials beside the tray. Don’t say a word. Watch what they do. With Maya, I did this when she was three and a half. She stared at it for a full minute, then — slowly — placed a red pom-pom next. Then blue. Then she looked up at me like she had just solved a crime. I will never forget that face.
The reason this tray builds focus and not just color knowledge is because it asks the child to hold information in their head (the pattern so far) and make a decision based on it. That’s working memory and logical deduction, right there on a $3 baking tray.
Upgrade the difficulty by adding a third color, or switching to shapes instead of colors. When Leo was five, we moved to pattern sequences using wooden geometric blocks, and he would spend 20 solid minutes arranging and rearranging. For a five-year-old boy who could barely sit through a picture book, that was monumental.
2. The Nature Sorting and Classification Tray
Best age: 3–7 years
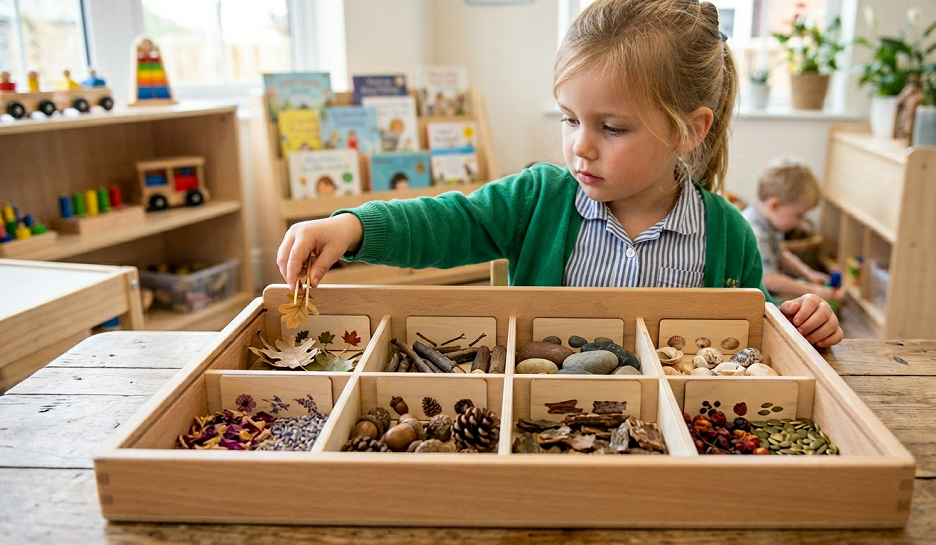
Go outside before you set this one up. Collect leaves, rocks, sticks, seed pods, pinecones, acorns — whatever your environment offers. Bring them in and spread them on a tray. Add small labels or hand-drawn cards with category names: smooth, rough, big, small, living things, not-living things.
This tray builds scientific classification skills and the kind of focused observation that’s foundational to logical thinking. It also builds vocabulary, which parents often overlook when they’re focused on the “educational” angle.
I have found that children who regularly sort and classify natural objects show significantly more patience in problem-solving settings later on. There’s something about working with real, irregular things — not perfect plastic toys — that teaches a child that not everything fits neatly, and that’s okay. You find the best category. You make a judgment call. You revise.
When Sarah was six, she informed me that a particular acorn cap belonged in both “rough” and “round” and wanted to make a new category. That kind of flexible, category-questioning thinking is exactly what this tray is supposed to produce. Don’t shut it down. Hand her the marker and let her make the new label.
The only caution here: with very young children (under three), avoid small rocks or seeds that are choking hazards. Swap them for larger pinecones and big leaves only.
3. The Lock-and-Key Discovery Tray
Best age: 3–6 years
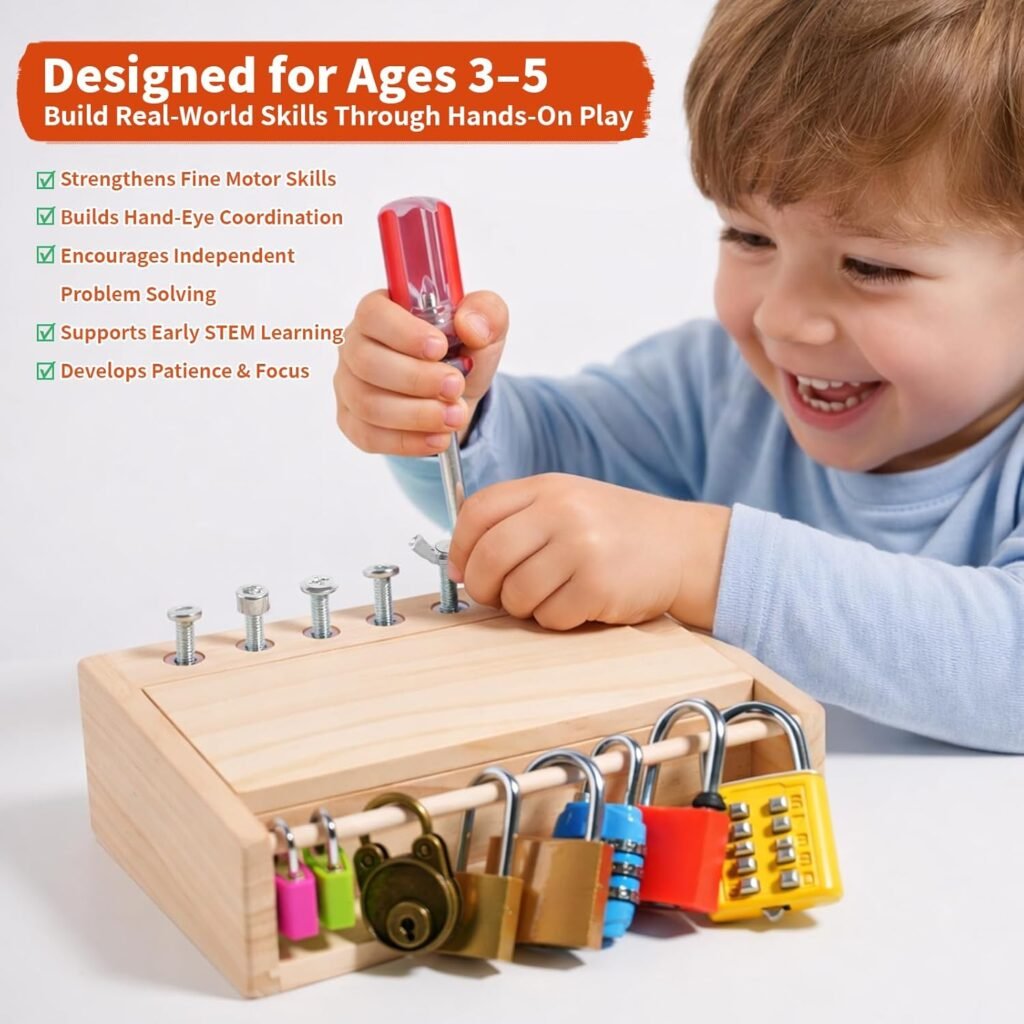
This one requires a small upfront investment, but it pays off for years. Buy a set of small padlocks with different keys — you can find these cheaply online or at hardware stores. Mix the keys up and place them on a tray beside the locks.
The task: match each key to its lock.
This sounds simple. It is not. This tray demands sustained trial-and-error logic — the backbone of scientific thinking. A child has to observe (this key looks similar to that lock), hypothesize (maybe this one fits?), test, fail, revise, and try again. Without any instruction from you.
I’m going to be blunt here: this is the tray that separates “I give up” kids from “I haven’t figured it out yet” kids. Not because some children are smarter, but because this tray can actually train persistence if you introduce it gradually and celebrate the process, not just the success.
When Leo was four, he cried the first time the key didn’t work. I did not swoop in and fix it. I said, “Hmm. What if you tried the next one?” He grumbled. He tried. He found the match. He hasn’t rage-quit a puzzle since — and he’s in college now.
4. The Loose Parts Building Challenge Tray
Best age: 4–8 years
Gather a mix of “loose parts” — corks, wooden spools, small cardboard tubes, flat stones, bottle caps, craft sticks. Set them on a tray with a simple challenge card: Can you build something that stands on its own? or Can you make a bridge that holds a small toy?
This is where engineering thinking and spatial logic collide with play. The open-ended challenge forces a child to plan ahead, anticipate failure, and adapt. There is no single correct answer, which actually makes this tray harder, not easier — and far more valuable for developing executive function.
I’ve found this tray works best when you give one constraint. Not “build whatever you want” — that’s too open. And not “build a house” — that’s too narrow. Something like “build the tallest thing that doesn’t fall” is exactly the right level of productive challenge. The constraint is what creates the thinking.
Change the challenge card every few days to keep the tray fresh. The same materials can produce wildly different thinking depending on the prompt.
5. The Number Bond and Counting Objects Tray
Best age: 4–7 years
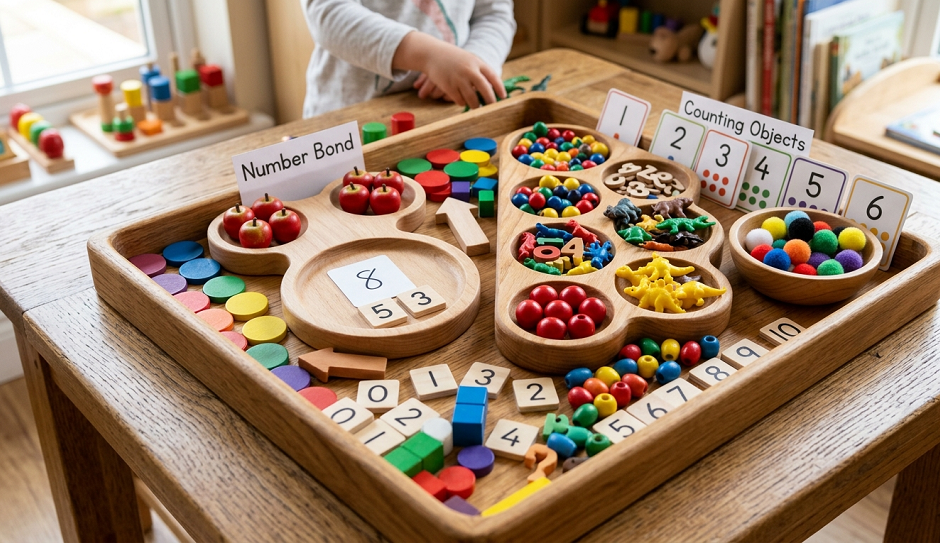
Fill a tray with small objects — buttons, pebbles, dried beans, mini erasers. Add number cards (you can write them on index cards). The task: place the right number of objects on each card.
Once counting is easy, introduce number bonds: put out a card that says “5” and two small bowls. How many ways can you fill the two bowls to make 5? (1 and 4? 2 and 3? 0 and 5?) This is early addition logic, and it builds a mental flexibility with numbers that rote counting simply doesn’t provide.
Maya struggled with math anxiety later in elementary school, and I genuinely believe part of it was that we hadn’t done enough of this kind of exploratory number play early on. I’d relied too heavily on worksheets and apps. When she came home frustrated in second grade, we went back to beans and bowls for a month. It reset something. The hands-on physical manipulation of real objects, feeling quantities rather than just reading them, made numbers make sense again.
This tray is also one of the best for quiet independent focus in the 5–7 age range. There’s something meditative about counting and arranging small objects that children find calming.
6. The Shadow Matching and Shape Logic Tray
Best age: 3–6 years
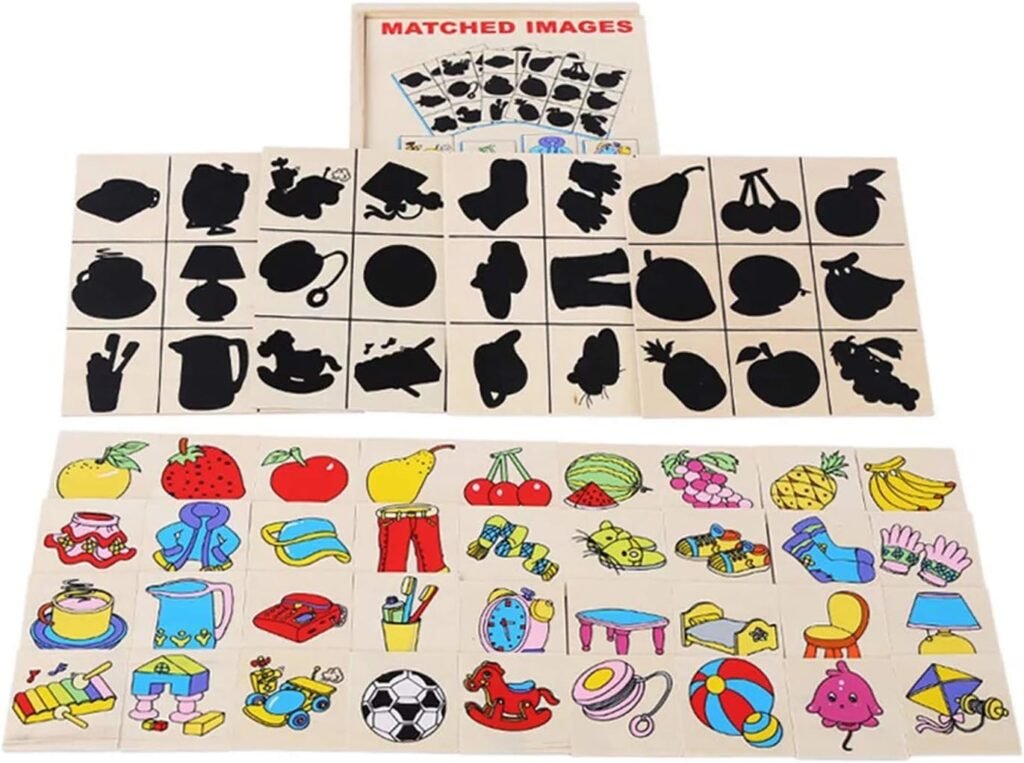
Print or draw black silhouettes of simple objects — a key, a leaf, a spoon, a pencil. Laminate them or slip them into a clear sleeve. Place the actual objects in a basket beside the tray. The child matches the object to its shadow.
This tray builds visual-spatial reasoning and abstract thinking — skills that underlie everything from geometry to reading maps to understanding diagrams. It also demands careful observation. A child has to look hard at an object and ask: what is its essential shape? What does it look like with all the color and texture removed?
That’s not a small cognitive leap for a three-year-old. Celebrate every match.
Upgrade the difficulty by making the silhouettes slightly different sizes, or by adding objects that are similar (a key and a butter knife look surprisingly alike in shadow). When children argue that something “almost matches,” they’re doing real logical reasoning. Lean into it.
7. The Sequencing Story Tray
Best age: 4–8 years
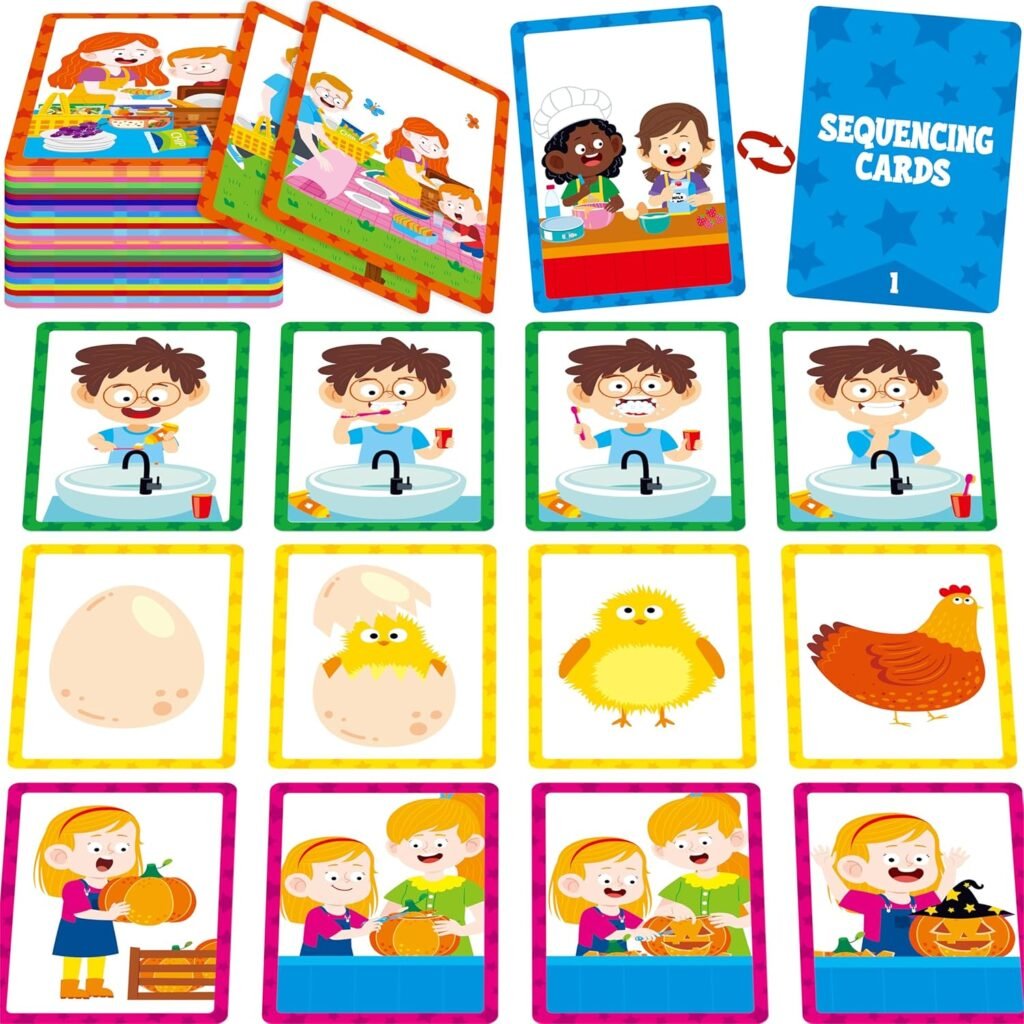
Print or cut out 4–6 images that tell a simple story in sequence: a seed, a sprout, a small plant, a full-grown flower. Or: an egg, a caterpillar, a chrysalis, a butterfly. Mix them up on the tray. The task: arrange them in the correct order.
This tray builds sequential logic and narrative reasoning — two skills that are deeply linked to reading comprehension and critical thinking. A child who can look at a set of images, understand that events have a natural order, and arrange them correctly is developing the same cognitive muscle they’ll use to follow arguments, understand cause and effect, and construct their own logical explanations.
Once they’ve mastered straightforward sequences, add in a “trick” card — an image that doesn’t belong. Ask them to find the odd one out and explain why. That “explain why” part is crucial. Verbal reasoning deepens understanding enormously.
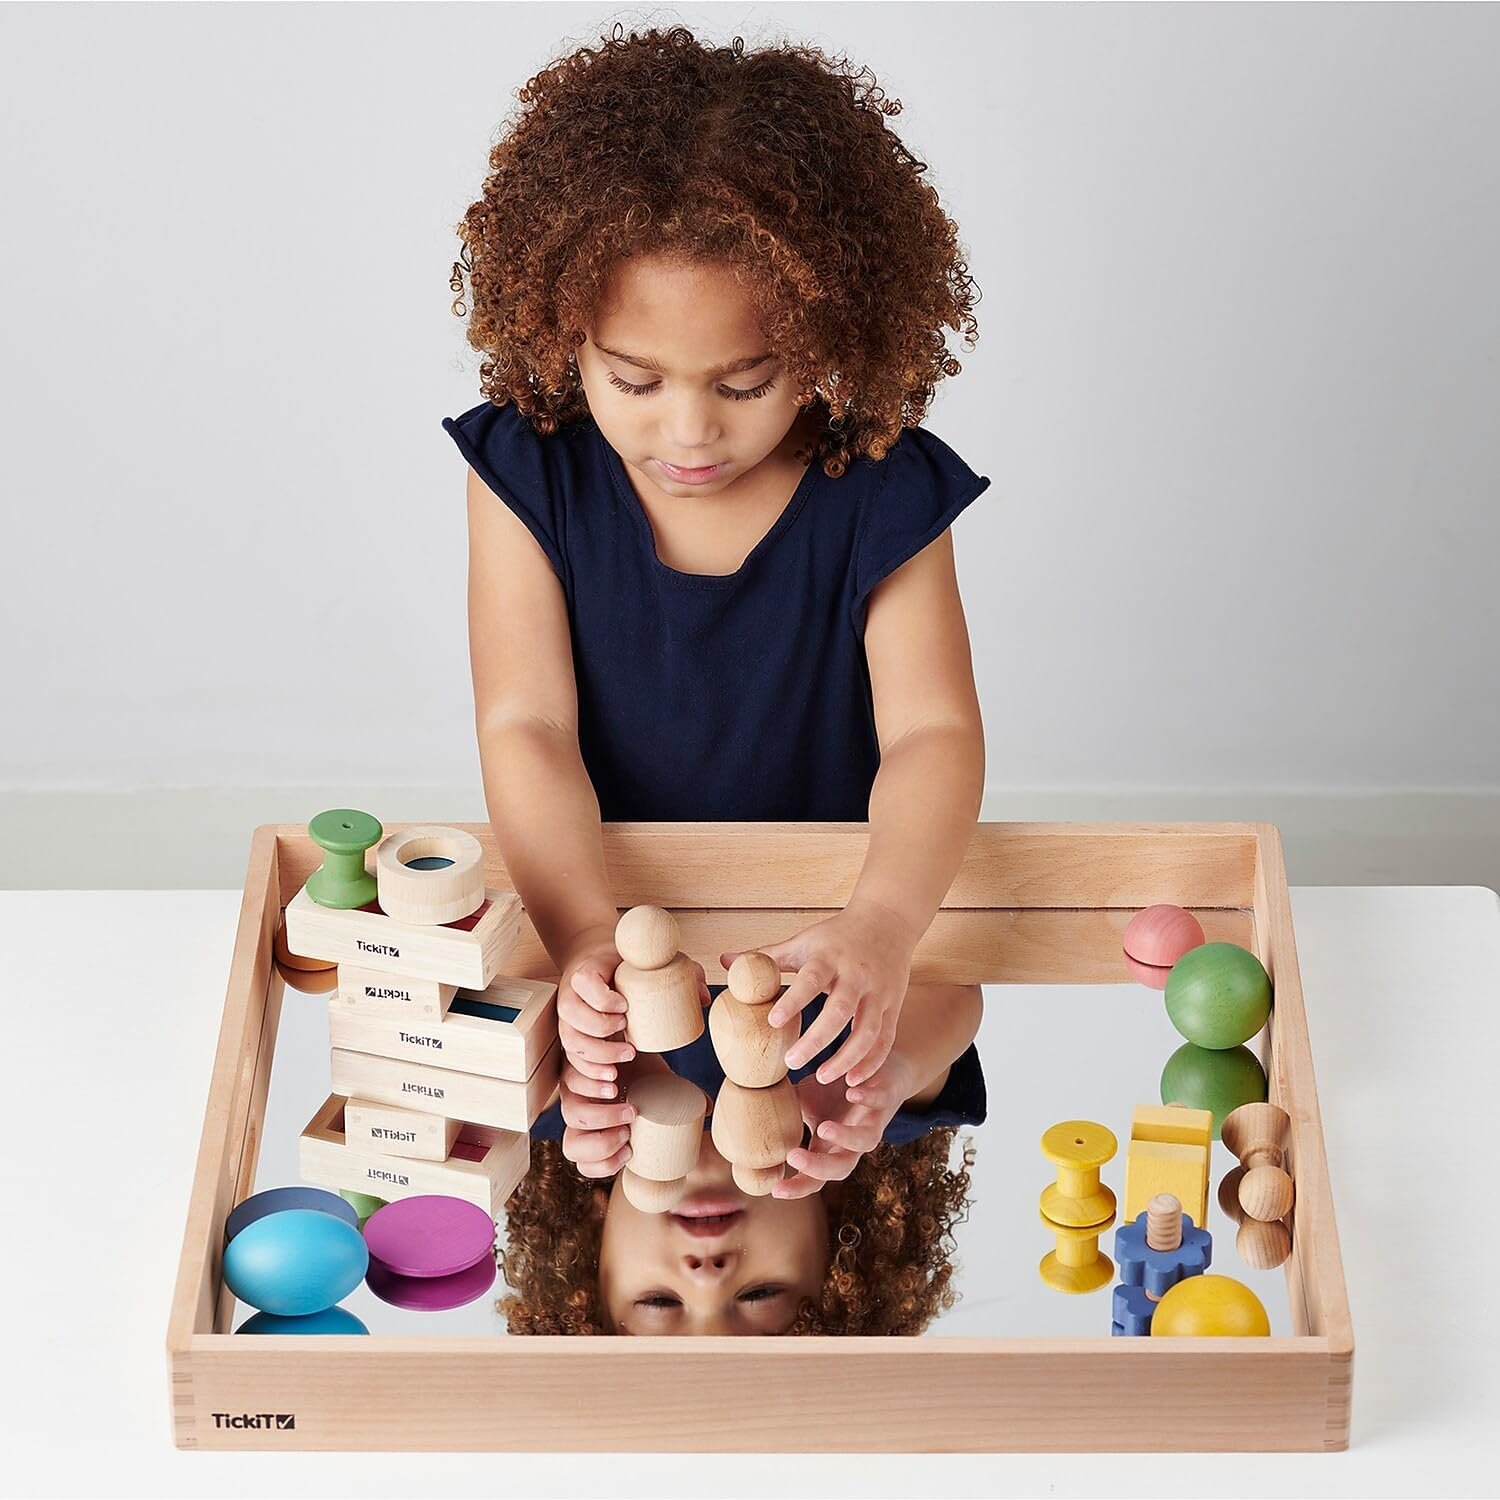
8. The Mirror and Symmetry Exploration Tray
Best age: 4–8 years

Place a small handheld mirror (plastic-backed for safety) in the center of the tray. On one side, create a half-design using pattern blocks, colored tiles, or stickers. The challenge: complete the other half to make it symmetrical.
This tray is an absolute favorite of mine because it teaches mathematical symmetry, spatial reasoning, and visual logic while feeling completely like play. Kids are fascinated by mirrors. They will spend far longer at this tray than they would at a worksheet on the same concept.
Sarah, who is now a design professional, told me recently that she still thinks about symmetry the way she did as a kid — physically, spatially, by feel. I think this tray had something to do with that.
Add complexity by using more intricate half-patterns as children grow. By age seven or eight, children can be challenged to create a symmetrical design from scratch, without a template.
9. The Weighing and Predicting Tray
Best age: 5–9 years
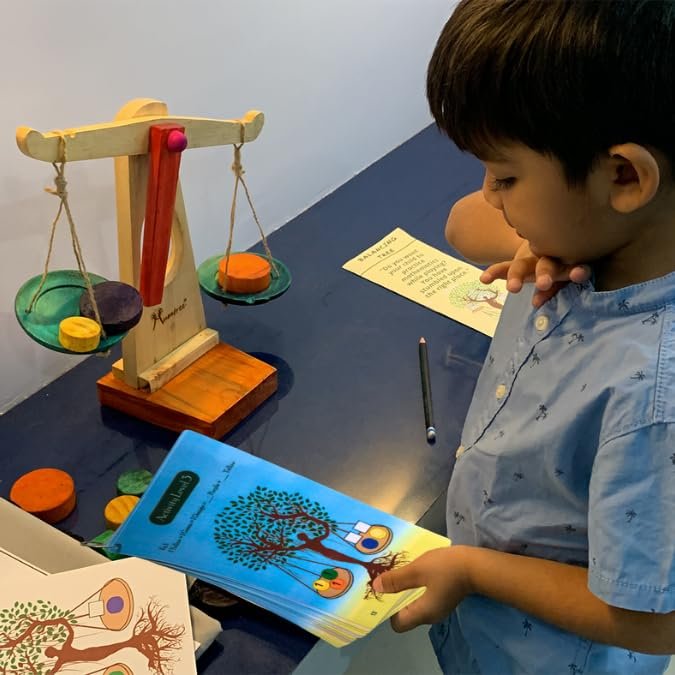
You need a simple balance scale for this one — they’re inexpensive and absolutely worth having. Set out a collection of small objects of varying weights: a marble, a cotton ball, a wooden block, a large button, a small toy car.
Before placing anything on the scale, ask the child to predict which is heavier. Then test it. Record the results on a simple chart (even just check marks).
The heart of this tray is the prediction step. Making a hypothesis, testing it, and revising your thinking based on evidence is the scientific method in its simplest form. And doing it with your hands — feeling the surprise when a small metal marble outweighs a large foam block — makes the lesson stick in a way a video never could.
I’ve found this tray to be particularly effective for children who are resistant to “sitting and learning.” The physical surprise of the scale tipping is intrinsically motivating. They want to keep testing. That wanting is the whole point.
10. The Tangram Puzzle Tray
Best age: 5–10 years
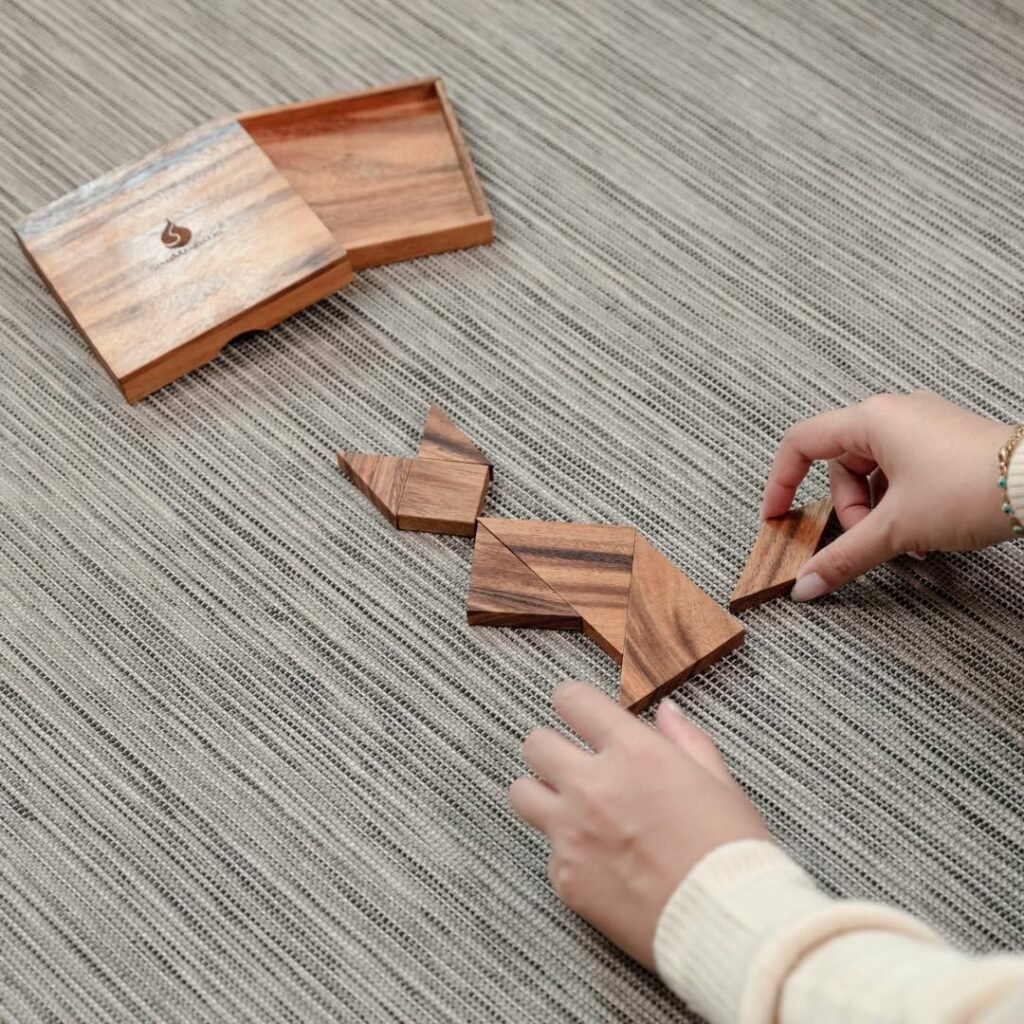
Tangrams — the classic seven-piece geometric puzzles from ancient China — are one of the most brilliant logic-building tools ever created, and I’m consistently baffled by how underused they are in Western homes.
Set a set of tangram pieces on a tray alongside a card showing a silhouette shape to recreate: a running person, a house, a swan, a boat. The child must figure out how to arrange all seven pieces to fill the silhouette exactly.
This builds geometric reasoning, spatial rotation skills, and patient problem-solving. It is genuinely hard. Even adults find tangrams challenging. And that difficulty is precisely the point — children need to encounter problems that don’t have an obvious immediate answer and learn to sit with them.
Leo refused to touch this tray for two weeks after his first frustrated attempt. Then one afternoon, he quietly took it off the shelf, sat down, and worked at it for forty-five minutes. He came and found me only after he’d solved it. That moment of self-directed persistence, owned entirely by him, was worth more than any trophy.
11. The ABC and Word Building Tray
Best age: 4–7 years
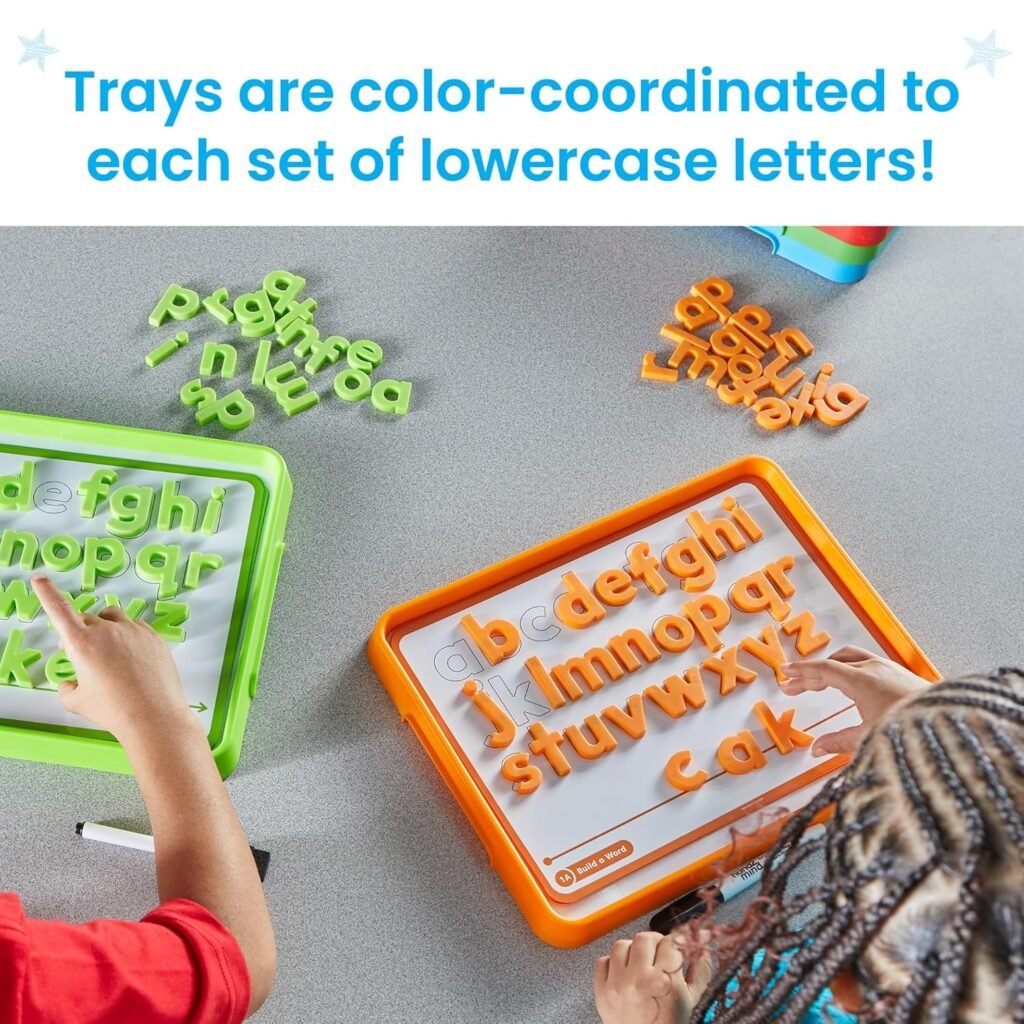
Set out letter tiles, magnetic letters, or letter stamps. Add a tray of sand, a whiteboard, or a simple foam mat. Provide picture cards — a picture of a cat, a hat, a dog, a sun — face-down in a small stack.
The child draws a card, looks at the picture, and builds the word using the letters. No writing required. No pressure. Just building.
This tray supports phonics, early literacy, and logical letter sequencing in a completely pressure-free environment. There are no red marks here. A wrong letter just gets swapped out. The physical act of choosing, placing, and rearranging letters gives children a sense of agency over language that worksheets can’t replicate.
One thing I learned the hard way: don’t correct immediately. If Leo spelled “kat” for cat, I’d say, “Oh, you found all the sounds! Let’s see if the letter card shows the same letters.” Then we’d check together. The difference between “you’re wrong” and “let’s check” is enormous for a child’s relationship with reading.
12. The Attribute and Logic Grid Tray
Best age: 6–10 years
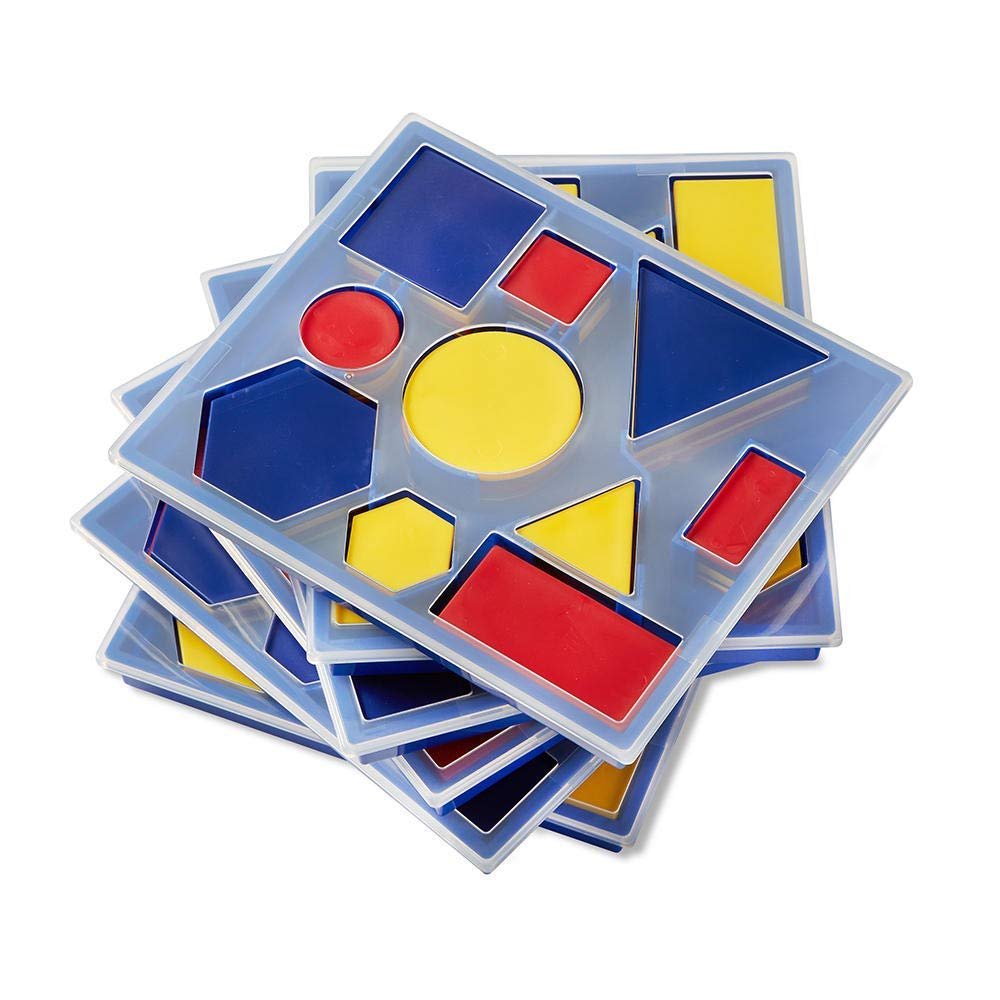
This one is for the slightly older child who’s ready for a real challenge. Create a simple 3×3 grid on a tray using tape or a drawn mat. Gather objects with multiple attributes — shape, color, and size (small red circle, large blue square, small blue triangle, etc.).
Set up two of the rows and two of the columns, leaving some cells empty. The child must figure out what goes in the missing cells based on the pattern of attributes.
This is a matrix logic puzzle — the same kind of thinking used in IQ tests, chess strategy, and computer programming. But at this level, it’s completely accessible, completely playful, and completely empowering.
When I first introduced this to Sarah at age seven, she looked at me like I’d lost my mind. By the third session, she was making her own grids and challenging me to solve them. That’s the moment you know a tray has done its job — when the child becomes the teacher.
The “Real Talk” Section: What Doesn’t Work and What’s Not Worth the Hype
I’d be doing you a disservice if I only showed you the wins.
Here’s the honest truth: beautifully curated, Instagram-worthy trays are a total waste of your energy. I spent two hours one Sunday making a gorgeous sensory tray with dyed rice, tiny figurines, and a hand-painted wooden sign. Maya looked at it for four minutes, poured the rice on the floor, and went to find the cat. Four minutes.
The trays that work are the ones built around a clear, achievable challenge — not the ones that look pretty. Every single time I’ve prioritized aesthetics over purpose, I’ve been disappointed. A paper plate, some dried beans, and a challenge card will outperform an elaborate setup nine times out of ten.
Also: don’t introduce too many trays at once. I made this mistake with Leo. I set up four trays in one week, hoping to build momentum. Instead, he was overwhelmed and decided all trays were boring. It took three weeks to rebuild his interest. One tray at a time. Let them master it. Then rotate.
And one more hard truth: some children will not take to tray play easily at first. If your child has sensory sensitivities, attention challenges, or has been heavily screen-dependent, the initial resistance can be discouraging. Don’t give up after one attempt. Try shorter windows — five minutes, then done. Sit with them at first, then gradually step back. The independence builds over time, not overnight.
You’re not failing. You’re calibrating.
Parting Wisdom
Raising three kids taught me that the moments of real learning rarely look like learning. They look like a four-year-old frowning at a pom-pom. They look like a seven-year-old talking to herself while arranging geometric shapes. They look like a nine-year-old who won’t come to dinner because he is this close to solving the tangram swan.
Those moments are the ones that count. Not the tests, not the grades — those quiet, focused minutes when a child is working something out entirely on their own.
A play tray doesn’t make you a perfect parent. But it gives your child the space to become a more confident thinker. And in my experience, that confidence — the quiet, earned kind that comes from solving your own problems — is the gift that carries them furthest.
So tell me: which tray are you going to try first? And if you’ve already set up play trays at home, I’d love to hear what’s worked — or hilariously failed — in your house. Drop it in the comments below. This community learns best when we share honestly with each other.
Published on GentleParenting101.org | Written by Lennah Evans, a mom of three who has stepped on every type of loose part imaginable and still thinks it’s worth it.