

My living room looked like a tornado had gone through it — again. Leo, my youngest, had dismantled every couch cushion, stacked them into a precarious fort, and launched himself off the armrest with the confidence of a tiny Olympic diver. He was three. I hadn’t slept properly in six months. And every well-meaning person who suggested “just take him to the park” clearly had never tried bundling up a feral toddler in the middle of a February ice storm.
Here’s what nobody tells you before you have an energetic child: the energy doesn’t go away. You cannot tire them out. You cannot reason with it. You can only redirect it — and redirect it well, or pay the price in broken picture frames and frayed nerves.
After raising three kids — Sarah, Maya, and Leo — and surviving everything from apartment living with zero outdoor space to full-on suburban chaos, I’ve become a firm believer in creating intentional indoor movement zones. The kind that burn energy, build coordination, and yes, keep your sanity more or less intact. These aren’t just cute Pinterest projects. Done right, they’re functional, safe, and genuinely worth every hour you put into them.
Why Toddlers Need a Physical Outlet (And Why Your Furniture Isn’t It)
Before we get into the actual builds, let me explain why this matters so much. Toddlers between the ages of 18 months and 4 years are in a critical window of gross motor development. Their brains are literally wired to climb, jump, hang, roll, and crash — not to sit still and watch educational television.
When I tried to suppress Leo’s physical energy by saying “no climbing,” all that happened was he found sneakier places to climb. I’ve found him on top of the refrigerator. Twice. The goal was never to stop the movement — it was to give it a home.
Creating a dedicated movement zone tells your toddler: this is where your body gets to go wild. It sets a boundary that makes sense to them. And unlike constantly redirecting them away from danger, it gives you somewhere to redirect toward. That shift alone changed our household dynamic completely.
1. The Classic DIY Climbing Wall Panel
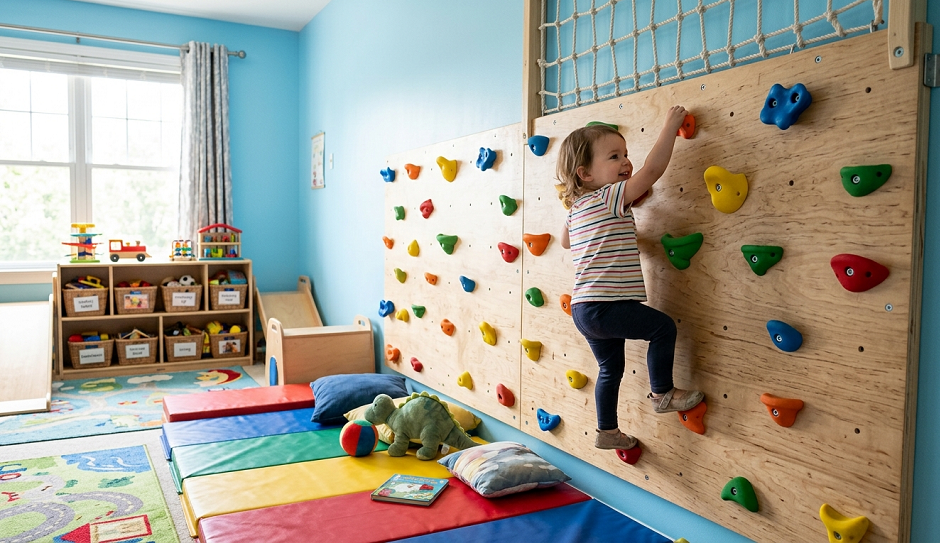
Best for: Small spaces, apartment living, toddlers 2–5 years
This is where most parents start, and for good reason. A wall-mounted climbing panel is one of the safest, most durable options you can build at home — and it doesn’t require you to be a master carpenter.
The basic concept is simple: you attach a sheet of ¾-inch plywood (roughly 4×4 feet is a good starter size) to a wall stud, then screw in commercial climbing holds. You can buy a starter set of 50+ holds online for around $30–50. The holds come with bolts and a t-nut kit. You drill through the plywood, set the t-nuts from behind, and the holds thread right in.
What makes this build work for toddlers — and what I’ve found a lot of tutorials skip over — is wall placement and height. Keep the bottom of the panel no more than 6 inches off the floor, and cap the top at about 4.5–5 feet. I also recommend angling the panel slightly back (5–10 degrees off vertical), which makes it more forgiving for little bodies still figuring out their weight distribution. Place a thick gymnastics mat or crash pad on the floor below. This is non-negotiable for me.
The configuration of holds matters more than most people think. Beginners should space holds no more than 8–10 inches apart at toddler height so the child always has something to reach. If holds are spaced for adults, little ones will get frustrated fast and abandon the whole thing. I’ve seen parents build gorgeous walls that their kids used exactly once because the holds were impossible to navigate. Rotate the hold positions every few weeks to keep the challenge fresh without rebuilding anything.
One more thing: use a stud finder before you start and anchor properly into studs or use a wall-mounted frame. A panel that pulls away from the wall is a nightmare scenario. This isn’t a project to rush.
2. The Pikler Triangle (And Why I Wish I’d Made One Sooner)
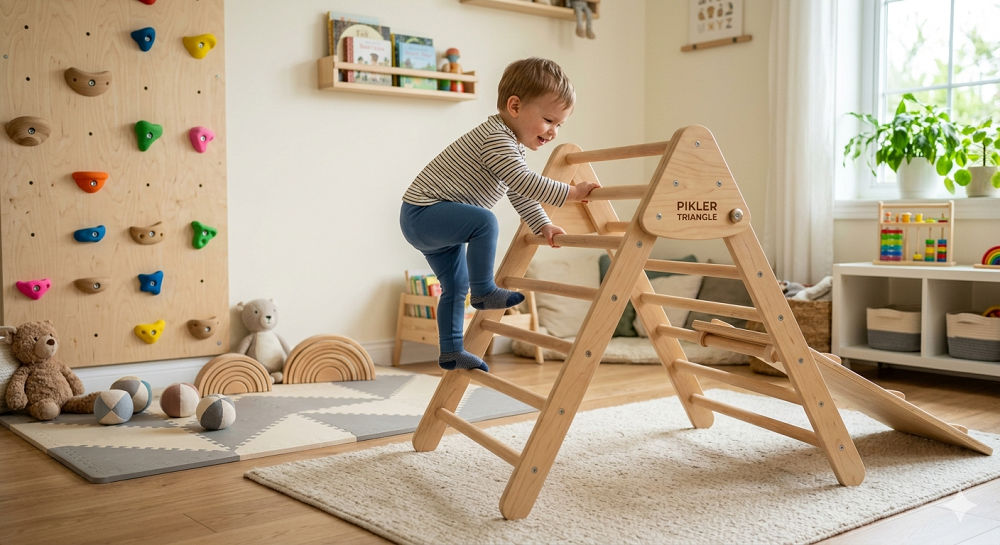
Best for: Ages 12 months through 4 years, multiple children
I’ll be honest — I thought the Pikler Triangle was overpriced and overhyped when I first saw it. I watched parents spend $200–300 on a simple wooden A-frame ladder and rolled my eyes. Then my neighbor built one for about $40 in lumber and I watched three toddlers spend two solid hours climbing, hanging, and inventing games I’d never seen before.
I was wrong. This is a total game-changer.
The Pikler Triangle is a freestanding wooden climbing frame shaped like an A-frame with horizontal rungs. The DIY version requires 1.5-inch hardwood dowels (birch or oak — nothing that splinters), two angled side frames cut from 1×4 lumber, and wood glue plus screws for the joints. The key measurement: rungs should be spaced about 9 inches apart for toddlers, and the overall height should max out around 36 inches for under-threes.
Sand every single surface until it’s glassy smooth. I mean it. Run your palm over every rung and every joint multiple times. Toddlers grip these things with their whole hands and feet and any rough patch will catch them. After sanding, finish with a food-safe beeswax or natural wood oil — avoid polyurethane, which can get slippery when little hands are sweaty.
What makes the Pikler truly special is what it teaches. It’s not a passive toy — it demands problem-solving. My neighbor’s daughter spent 20 minutes figuring out how to get from one side to the other without touching the ground. She didn’t ask for help. She figured it out. That kind of self-directed physical challenge is exactly what this developmental stage is built for. Pair it with a short wooden slide ramp (easy to add on the side) and you’ve got a toddler entertained for hours.
3. A Crash Pad & Foam Pit Corner
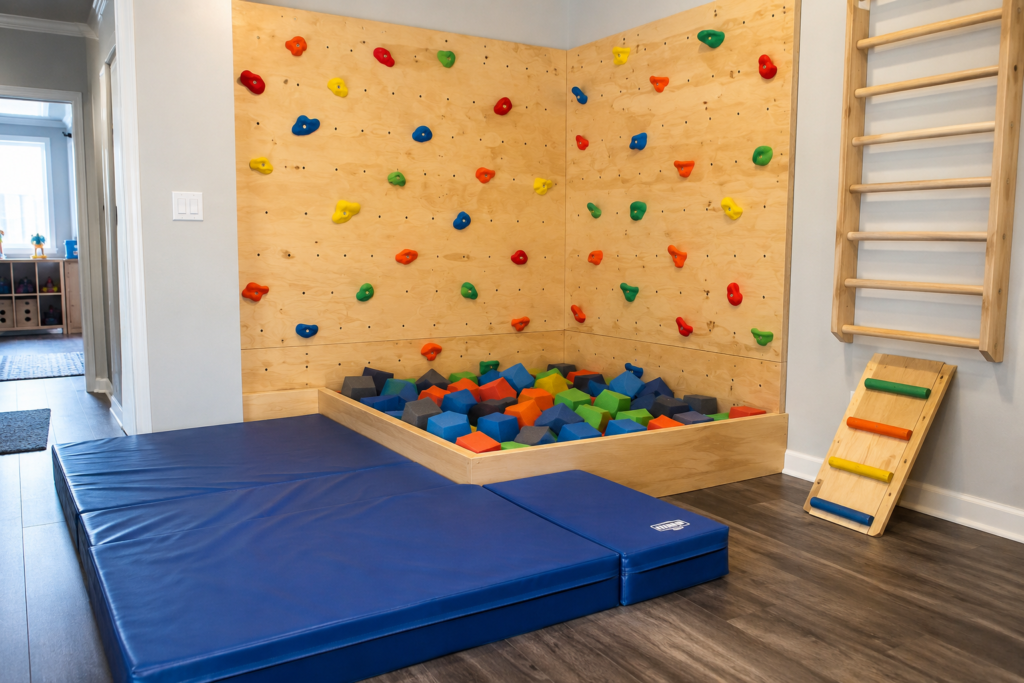
Best for: Jumpers, rollers, kids who “accidentally” fall constantly
Some kids aren’t climbers — they’re jumpers. Leo was a jumper. The boy would find any elevated surface and hurl himself off it with zero hesitation and maximum commitment.
A foam pit corner is the answer, and it’s far easier to set up than you think. You don’t need to build a frame. You need a defined corner of a room, a waterproof mattress cover, and foam cubes. Buy foam pit blocks — 6-inch cubes of open-cell foam — and fill the corner to a depth of about 18–24 inches. A standard corner pit of about 4×4 feet takes roughly 40–50 cubes, which runs about $80–120 total.
Define the edges clearly. I used a low wooden border (basically a shallow box frame) to keep the foam cubes contained and to signal to the child where the pit starts and ends. Paint it a bright, distinct color. This visual boundary matters more than you’d think for toddlers who are still learning spatial reasoning. They quickly learn that this is the safe landing zone — and over time, they’ll actually aim for it.
Add a small step stool or low platform next to the pit to give them something to jump from. Start it low — 6 inches off the ground — and increase height as confidence and coordination grow. We went from a step stool to a small IKEA step platform to eventually a 12-inch wooden launch pad over about six months. The progression kept it exciting without suddenly introducing height that exceeded what Leo could handle.
One quick side note: foam pits need to be fluffed and rotated regularly or the cubes compress and lose their cushioning. I learned this after about three months when I realized the corner of the pit had basically turned into a firm mat. Mix the cubes up weekly if your child uses it daily.
4. The Sensory Movement Wall
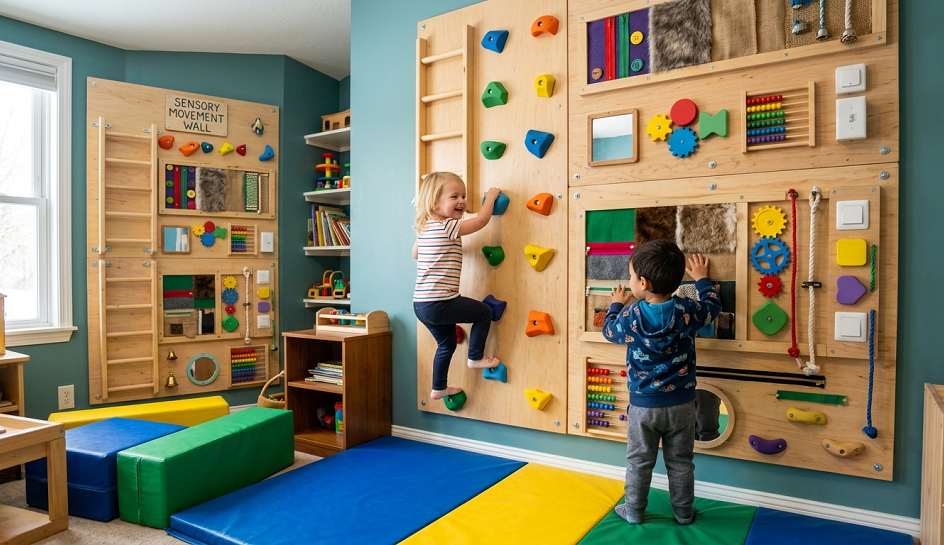
Best for: Ages 18 months–4 years, sensory-seeking children
This one surprised me by becoming my kids’ absolute favorite. A sensory movement wall is exactly what it sounds like: a section of wall covered in tactile, interactive panels that engage both the body and the senses simultaneously.
Here’s what I put on ours: a fabric tunnel hoop attached to the wall (kids push their heads through), a panel of different-textured materials to run hands across (faux fur, sandpaper, bumpy rubber, smooth wood), a series of spinning discs at different heights, a set of giant pegboard holes with soft foam balls for throwing and retrieving, and two hanging ribbons for pulling and swinging.
The build is modular — each element is independently attached to a large pegboard or a plywood base panel. Use French cleats if you want to be able to swap things in and out easily (and you will want to, because toddler attention spans are what they are). Total cost for materials was about $60–80 for me the first time around.
What makes this genuinely different from a climbing wall is the sensory engagement. Kids who are overloaded, overstimulated, or dysregulated often respond incredibly well to proprioceptive input — that’s the physical sensation of pressing, pulling, and pushing against resistance. A movement wall provides exactly that, in a calm, structured way. Two of my three kids had sensory-seeking tendencies, and this wall did more for afternoon meltdown prevention than any other tool I’ve tried.
The spinning discs deserve a special mention. Make them yourself with a smooth wooden circle, a bolt through the center, a bearing, and a backing plate. Kids will spin these for 20 minutes straight. It sounds absurd until you watch it happen.
5. The Indoor Balance Beam & Stepping Stone Course
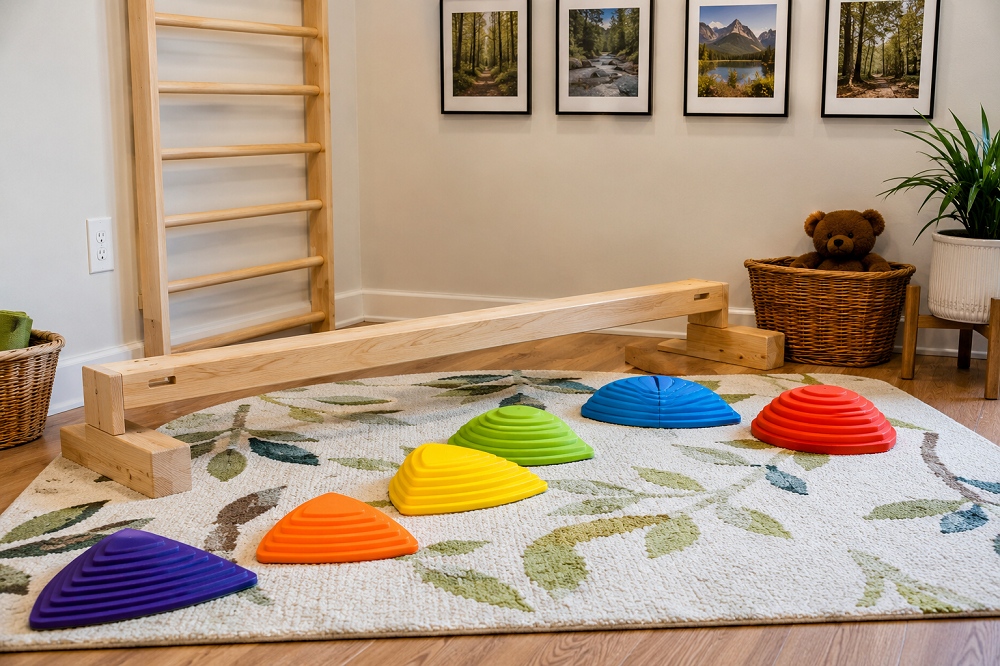
Best for: Ages 2–5, all activity levels, low budget
This is the cheapest, most underrated setup on this list, and the one I recommend to every parent who tells me they have no space or no budget. I’ve found that parents skip this in favor of flashier builds and then wonder why their kids still won’t stop running into the walls. Balance work is foundational and calming in a way that pure climbing isn’t.
A DIY balance beam is a 2×4 or 2×6 plank of lumber, sanded smooth, finished with wood oil, and laid flat on the floor. That’s it. For toddlers 2–3 years old, the beam sits directly on the floor with no elevation. At 3–4 years, you can add two low wooden cradles underneath to raise it 2–3 inches. The beam should be no longer than 6–8 feet for indoor use.
Pair the balance beam with a set of stepping stones. Buy silicone or foam stepping stones online (they come in lily pad shapes, rocks, numbered circles), or cut your own from thick upholstery foam and coat them with non-slip fabric. Scatter them across the floor in a winding path. The goal is for the child to navigate the path without touching the ground.
What I love about this setup is how naturally kids extend it themselves. Sarah, my oldest, started building her own courses using stepping stones, the balance beam, and throw pillows by age three. She’d narrate elaborate stories about the “lava floor” and spend 45 minutes on a course I’d set up in 10 minutes. It costs almost nothing and requires zero wall anchoring.
Refresh the course layout every few days to maintain interest. Move the stepping stones closer or further apart as skills improve. Add a small hurdle (a wooden dowel laid across two stacks of books) for kids who are ready for more challenge.
6. The Hanging Bar & Swing Corner
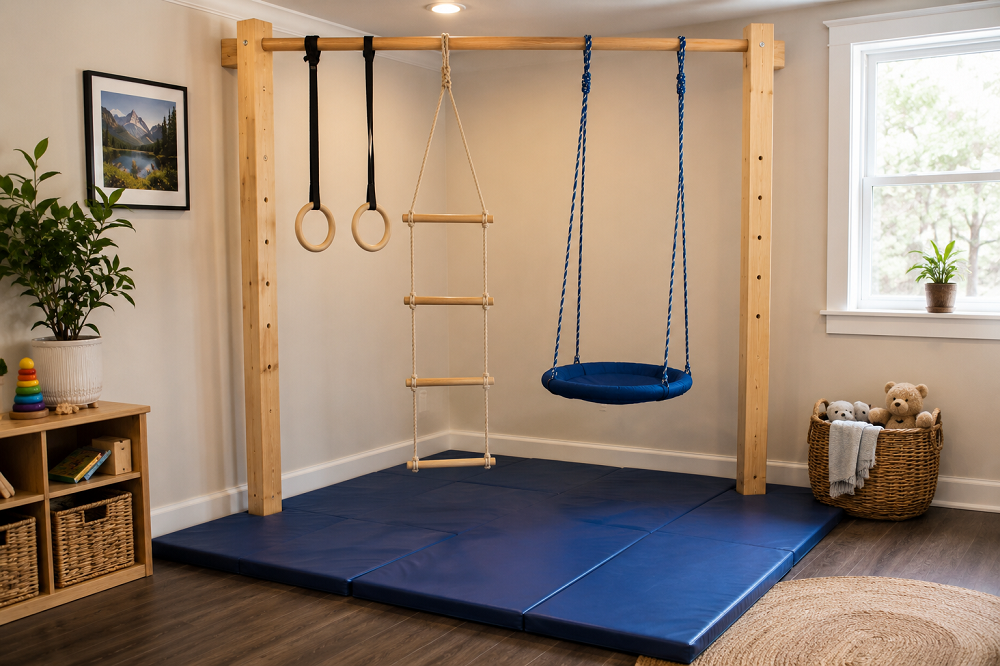
Best for: Ages 2.5–5, kids who love to hang and swing
Installing a proper hanging bar changed my entire outlook on indoor movement. This was Leo’s favorite — and the one my husband was most skeptical about until he saw how much it actually got used.
A ceiling-mounted horizontal bar (use a 1.25-inch steel pipe or a commercial gymnastics bar rated for dynamic load) gives toddlers the ability to hang, swing, and build upper body strength in a way almost nothing else provides. Mount it between two ceiling joists — this is critical; do not mount into drywall alone — at a height where your child’s feet clear the floor by 6–12 inches when hanging. Hang a gymnastics mat directly below.
Once the bar is in, you have options. Start with just the bar for hanging and swinging. Add a simple knotted rope for climbing (make sure the knots are tight and the rope is rated for dynamic load). Add a small wooden swing seat on separate chains for a second child — just make sure both attachments are into different joists. Over time, this single corner became our most-used movement space because it grows with the child.
I do want to be genuinely honest about the installation: if you are not comfortable working with ceiling joists and load-bearing mounting hardware, hire someone. This is not the project to Google your way through at midnight and hope for the best. The stakes are too high. I know it feels like overkill for a toddler’s play corner, but a 35-pound child generating swing momentum can produce significant force on the mount point. Do this one right.
7. The Tunnel & Crawl-Through Zone
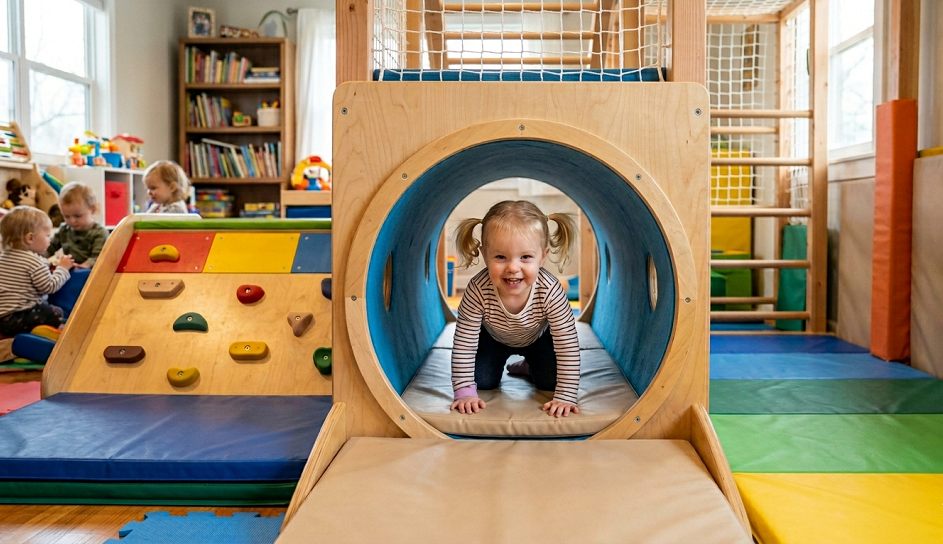
Best for: Ages 12 months–3.5 years, spatial awareness development
This is the final build — and honestly one of the most developmentally valuable, especially for children on the younger end of the toddler range. Crawling through enclosed spaces builds body awareness, spatial mapping, and proprioception in ways that open climbing doesn’t.
The easiest version: buy two or three pop-up fabric tunnels (about $15 each) and connect them at angles using bungee cord loops sewn onto the ends. Create a winding tunnel course across your living room floor. If you want something more permanent, build a low wooden frame with a PVC pipe arch and attach heavy canvas over it to create a semi-rigid tunnel your child can crawl through and adults can store flat.
What makes this build extra useful is how easily it combines with everything else on this list. I used to set up a full obstacle course: stepping stones to the balance beam, balance beam to the Pikler triangle, down the other side, through the tunnel, and into the foam pit corner. Round trip. Leo would do this circuit 15–20 times before he finally sat down. By then, he was ready to draw quietly for 30 minutes, eat a full dinner, and go to bed without a single protest.
That is worth every nail, every dowel, and every hour of sanding.
Real Talk: What Doesn’t Work (And What I Wasted Money On)
I’d be doing you a disservice if I only told you the wins. Here’s the truth about a few things I’ve learned the hard way.
Prefab plastic indoor gyms are a total waste of money, even if they look like the easier option. I bought two different brands across my three kids’ childhoods. Both wobbled under real use, both became boring within three weeks, and both ended up in garage sales. Toddlers sense the cheapness instinctively — they push harder against it, and the structural limits become a hazard faster than you expect. Build with wood and proper hardware. It lasts longer and is genuinely safer.
Wall stickers and “soft” climbing holds that come with toddler playroom kits are mostly decorative. If your child weighs more than 20 pounds and actually commits their body weight to a hold, those adhesive-backed holds will peel. Every time. Use hardware-grade t-nuts and real climbing holds from the start.
Not involving your toddler in the setup is a missed opportunity. I know it takes twice as long with a toddler underfoot, but letting them watch you build — handing you bolts, testing the rung spacing with their fingers, helping sand — creates buy-in that makes them use the space more. It’s their space. Let them feel that from the beginning.
Finally: don’t build everything at once. I’ve seen parents go all-in, build five things over a weekend, and watch their kid ignore all of it. Start with one thing. Let it become familiar and loved before adding the next. The progression keeps the movement zone feeling fresh for months.
A Parting Word
If you’ve made it this far, you’re already a better parent than you think. The fact that you’re reading about how to give your child’s energy a home instead of just fighting it every day — that’s the whole game. You’re not failing. You’re learning a language your toddler already speaks fluently.
Start small. Start simple. Even a foam pit corner and a balance beam can completely change your daily rhythm. You don’t need a garage conversion or a contractor. You need a Saturday afternoon, about $50, and the willingness to get on the floor and try it with them at least once.
These spaces aren’t just for the kids. Every time I watched Leo navigate that obstacle course with focus and joy, I felt the same thing. Something like relief. Like we’d both found a language we both understood.
What’s your biggest challenge when it comes to indoor movement for your toddler? Have you tried any DIY builds, or is there something on this list you’d love to tackle? Drop your questions and ideas in the comments below — I read every single one, and I love hearing what’s working (and what spectacularly isn’t) in your home.